Advanced Settings - Security
To enhance network security, the Security section provides various protection features. Available options vary by operating mode. Wireless Router mode includes Firewall, MAC Filter, IP Filter, Domain Filter, IP/MAC Binding, WPS, Wi-Fi Schedule, and ALG. Wireless Access Point mode includes WPS and Wi-Fi Schedule.
Firewall
A firewall monitors and controls incoming and outgoing network traffic based on security rules. It protects your local network from potential threats. The firewall is enabled by default, and we recommend keeping the default settings.
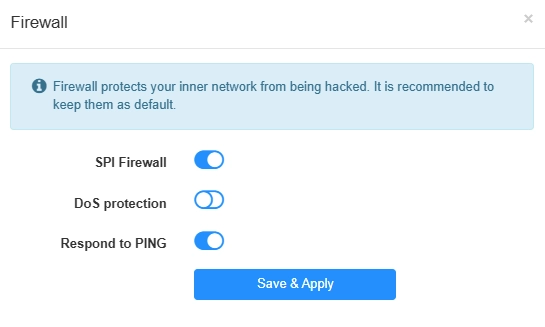
- SPI Firewall: Inspects network traffic and blocks unauthorized connections to improve network security.
- DoS Protection: Detects and blocks traffic associated with Denial-of-Service (DoS) attacks to protect network availability.
- Respond to PING: Allows or blocks responses to PING requests, which are used to test network connectivity.
MAC Filter
MAC Filter controls network access based on device MAC addresses. You can allow or block specific devices from connecting to your network.
To configure the MAC filter, please follow the steps below.
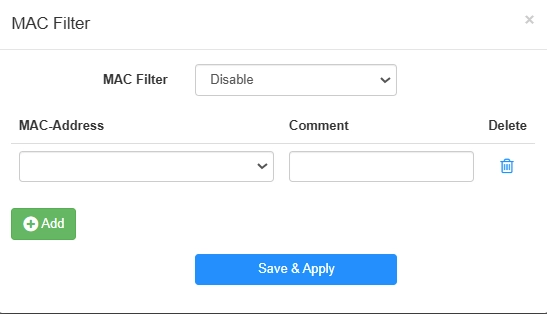
- Select a MAC Filter rules: Disable, or Allow all except listed, or Allow listed only.
- Disable: To disable the MAC Filter function. No MAC Address will be filtered.
- Allow all except listed: To block the device(s) with the listed MAC address from the Internet access.
- Allow listed only: To allow only the device(s) with the listed MAC address to access the Internet.
- Click Add to add entries.
- Select the MAC-Address and make a comment for the devices you want to filter.
- Click Save & Apply.
IP Filter
IP Filter controls network access by allowing or blocking traffic based on IP addresses.
To configure the IP filter, please follow the steps below.
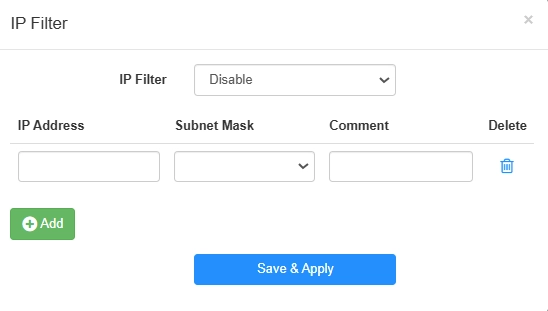
- Select your IP Filter rules: Disable, or Allow all except listed, or Allow listed only.
- Disable: To disable the IP Filter function. All devices are allowed to access the entire Internet.
- Allow all except listed: To allow any other devices except for those with the listed IP address(es) to access the Internet; or allow the devices to access the Internet except for those website with the listed IP address.
- Allow listed only: To allow only the device(s) with the listed IP address(es) to access the Internet; or allow the devices to access only the website with the listed IP address.
- Click Add to add entries, and set the following parameters.
- IP address: Enter the IP address you would like to filter.
- Subnet Mask: Select or customize the Subnet Mask as needed.
- Comment: Make a comment for this entry.
- Delete: To delete the entry easily as desired.
- Click Save & Apply.
Domain Filter
Domain Filter allows you to block or permit access to specific websites based on their domain names.
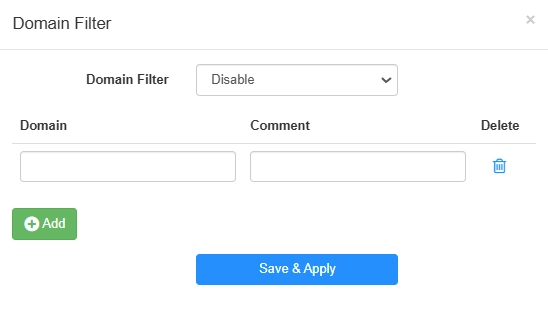
To configure the IP filter, please follow the steps below.
-
Select your Domain Filter rules: Disable, or Allow all except listed, or Allow listed only.
- Disable: To disable the Domain Filter function. No devices will be filtered.
- Allow all except listed: To block the device(s) with the listed Domain from the Internet access.
- Allow listed only: To allow only the device(s) with the listed Domain to access the Internet.
-
Click Add to add entries.
- Enter the Domain and comment of the devices you want to filter. Delete as needed.
- Click Save & Apply.
IP/MAC Binding
IP/MAC Binding associates an IP address with a specific MAC address to help prevent ARP spoofing and unauthorized devices from using the bound IP address.
To configure the IP & MAC Binding, please follow the steps below.
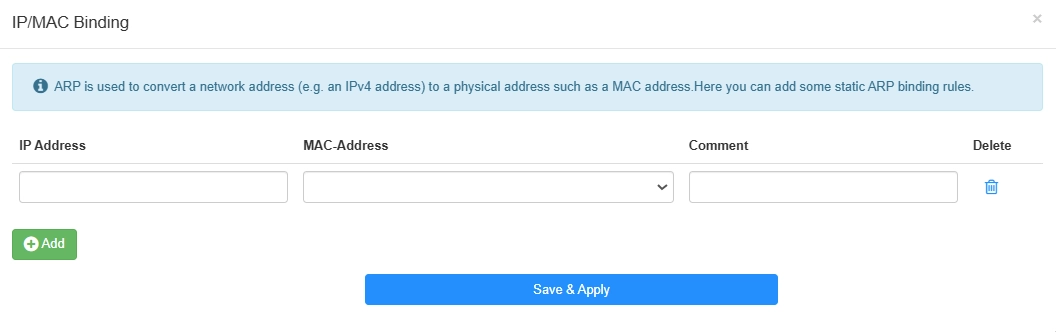
- Click Add to add entries.
- Enter the IP Address and bind it with a MAC-Address (select from the list or enter manually), and make a comment. Delete as needed.
- Click Save & Apply.
Success
Now you don't need to worry about ARP spoofing and ARP attacks.
Tip
The IP/MAC Binding also can work as an IP reservation. The device will get the IP address via DHCP.
WPS
Wi-Fi Protected Setup (WPS) allows you to connect compatible devices to your Wi-Fi network without manually entering the Wi-Fi password. Not all devices support WPS, so check device compatibility before using this feature.
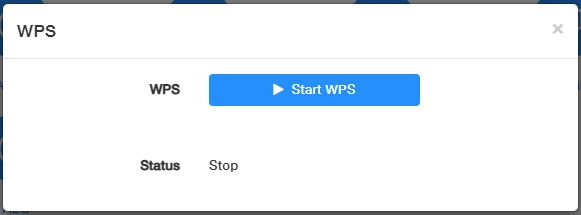
You may click Start WPS on the web management page or directly press the WPS button on the Router panel. Within 2 minutes, enable WPS on your personal device. Success will appear on the screen, indicating successful WPS connection.
WiFi Schedule
It allows the Router’s wireless network to turn on or off automatically at a specific time.
To configure the WiFi Schedule, please follow the steps below.
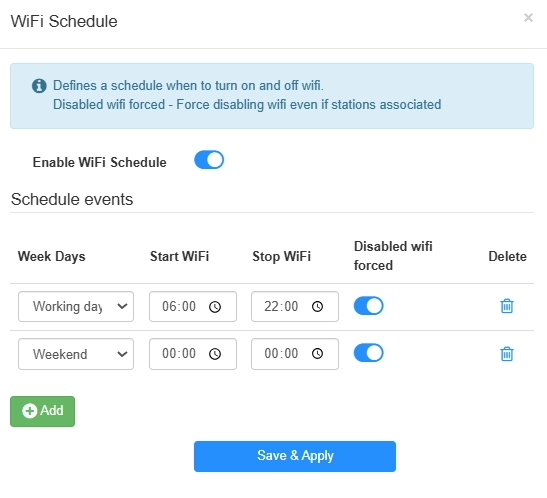
- Toggle Enable WiFi Schedule to activate this feature.
-
You may Modify/Delete/Add the entries. To specify the schedule, you need to set the Week Days, Start WiFi and Stop WiFi time. Enable Disabled wifi forced to force WiFi to shut off even if stations are associated.
- Modify: Simply modify the existing entries to your desired settings.
- Delete: Delete the existing entries as you like.
- Add: Add more or new entries as needed.
-
Click Save & Apply.
Note
The effective time schedule is based on the time of the Router. You can go to Advanced Settings -> System -> System Time to modify the time.
ALG
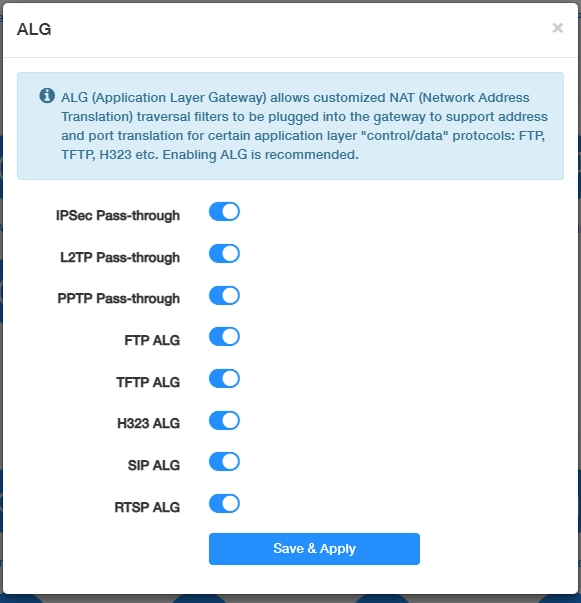
Application Layer Gateway (ALG) helps specific applications, such as FTP, TFTP, and H.323, work through NAT by handling their address and port information. ALG is enabled by default. If you experience call issues with voice or video applications, try disabling SIP ALG.