How to manage Cudy AP controller remotely?
Note
- C200P is used as an example below. Refer to your actual product for more details.
Step 1. Connect the AP controller.
Make sure you have connected your AP controller to the Internet and powered it on.
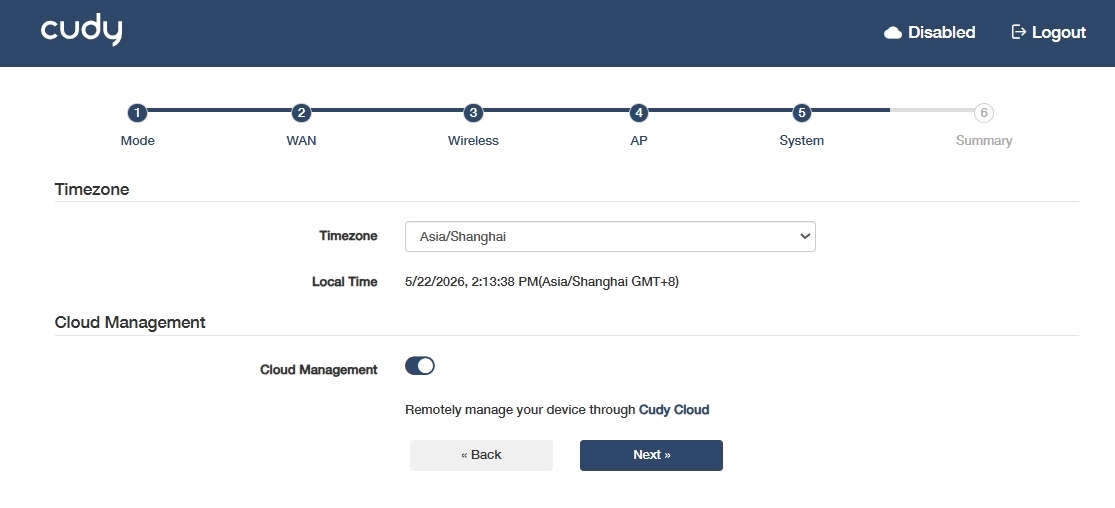
Step 2. Enable Cloud Management on cudyac.net.
-
If this is your first login to cudyac.net, just follow the Quick Setup and enable Cloud Management in the System step.
-
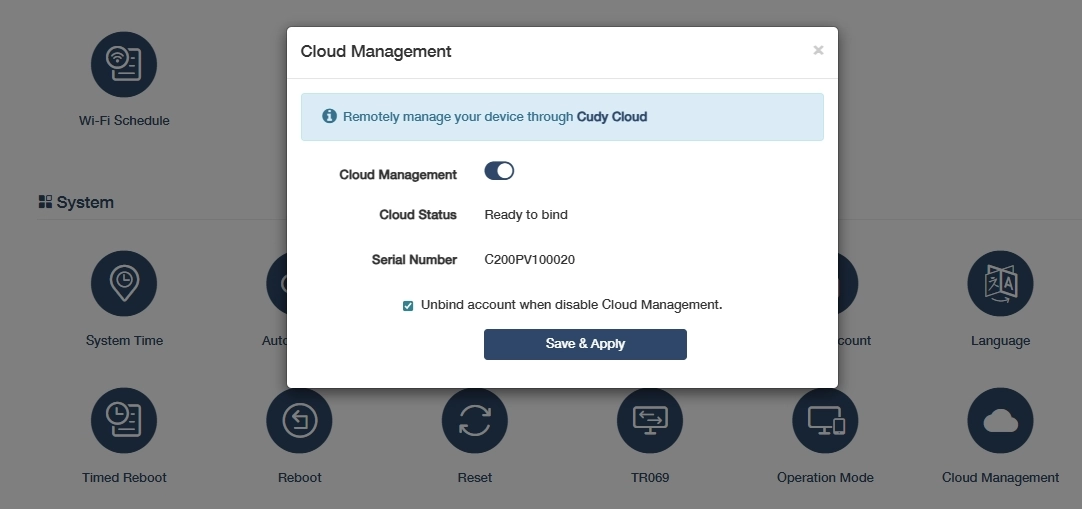
If you have already completed Quick Setup before, just log in to cudyac.net with your password, and go to Advanced Settings >> System >> Cloud Management to enable Cloud Management and click Save & Apply.
Note
- Before proceeding, ensure that the Cloud Status is Ready to Bind. If it is Offline, check your Internet connection.
- Note down the Serial Number for later use. It is also available on the product label.
Step 3. Bind the AP controller with your Cudy account.
-
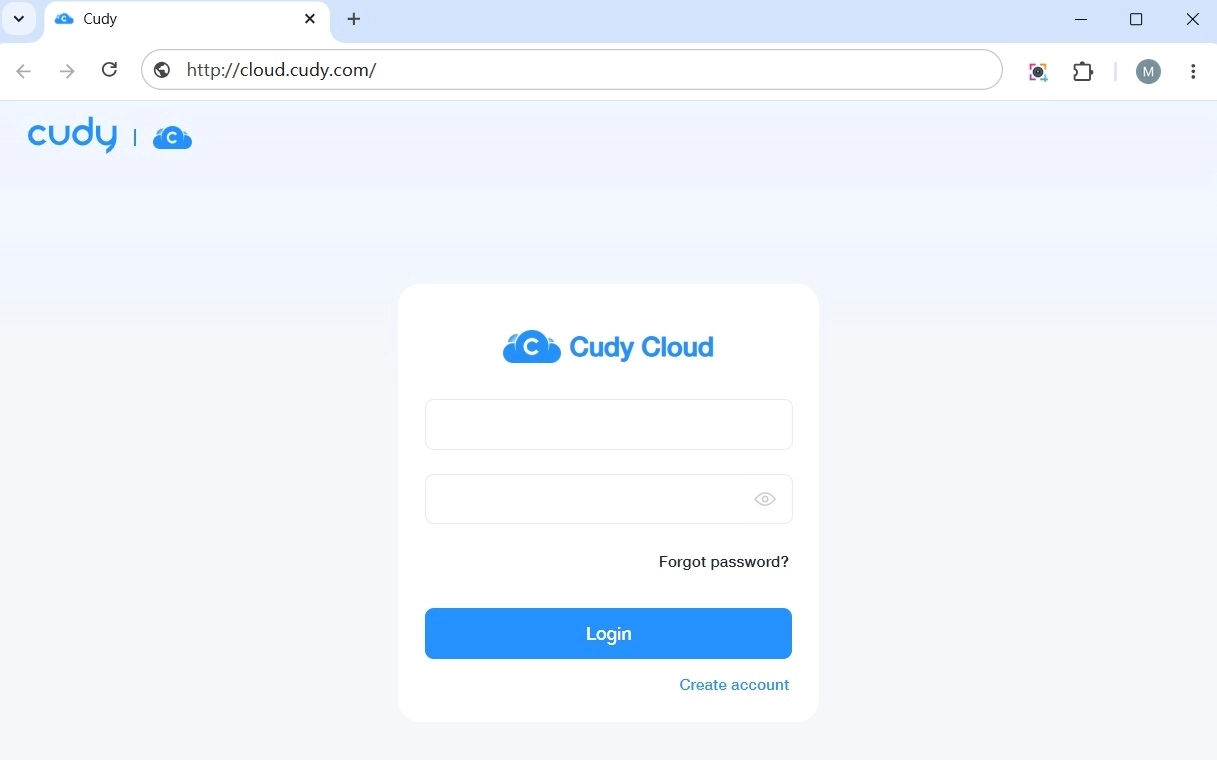
Go to Cudy Cloud at cloud.cudy.com, log in your Cudy account. Create account first if you don't have one.
-
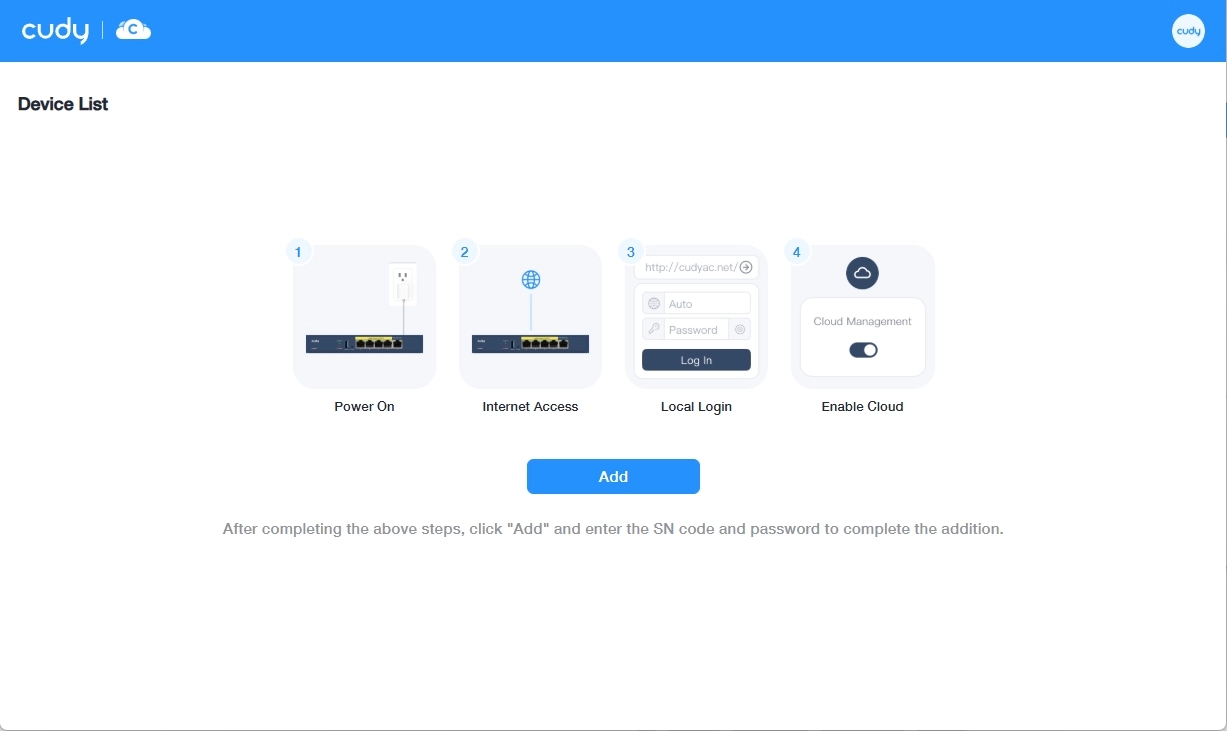
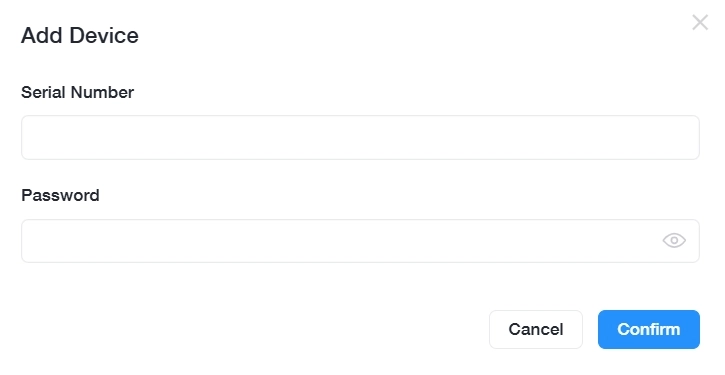
Click Add or Add Device.
-
Enter the AP controller's Serial Number and its web login Password. Click Confirm to bind it.
-
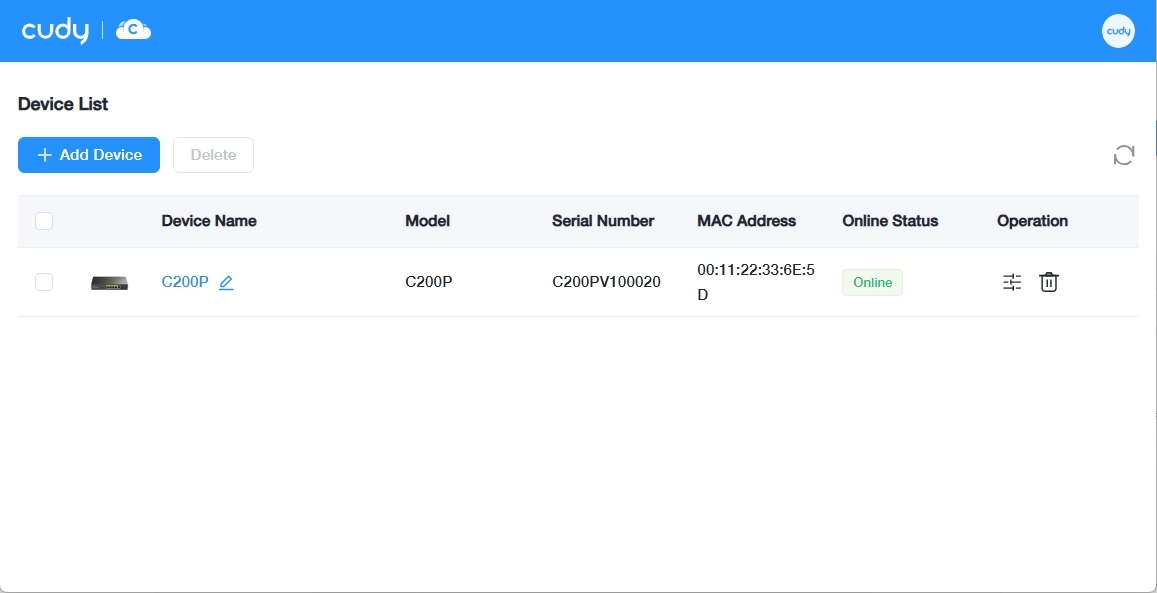
Once bound successfully, you can remotely manage the AP in Cudy Cloud by clicking its device name or the operation icon
 .
.
Tips
You can check the binding status on cudyac.net, either in the upper-right corner or under Advanced Settings >> System >> Cloud Management, as well as in the Cudy Cloud Device List. You can also unbind the device or switch to another Cudy account there.