How to setup your Cudy Router via Cudy APP?
This article will guide you to configure Cudy Router via Cudy APP step by step. Please install the Cudy APP from Apple APP store or Android Google Play first.

We suggest you to register and login a Cudy APP account which can be used to manage the router remotely via internet if your router support cloud management.
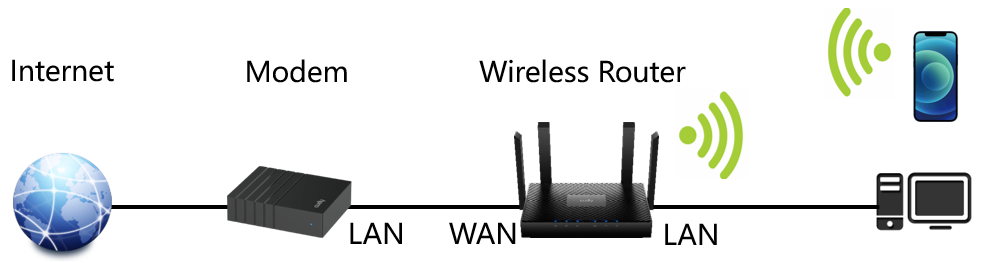
Common network topology:
Preparations:
- Unplug your modem and move the backup battery if it has one.
- Connect the router's WAN port to the powered-off modem via an Ethernet cable.
- Power on the modem, and then wait about 2 minutes for it to restart.
- Connect the power adapter to the router and wait the System LED turn to solid on (red or blue).
- Connect your phone to the router via Wi-Fi or Ethernet.
- Check the LEDs to confirm the hardware connections are correct.
Note
Please make sure you can access internet when you connect the computer directly to the modem. This means that your broadband line is working normally. If you fail to access the internet, please contact your Internet Service Provider to solve the problem with the line first.
-
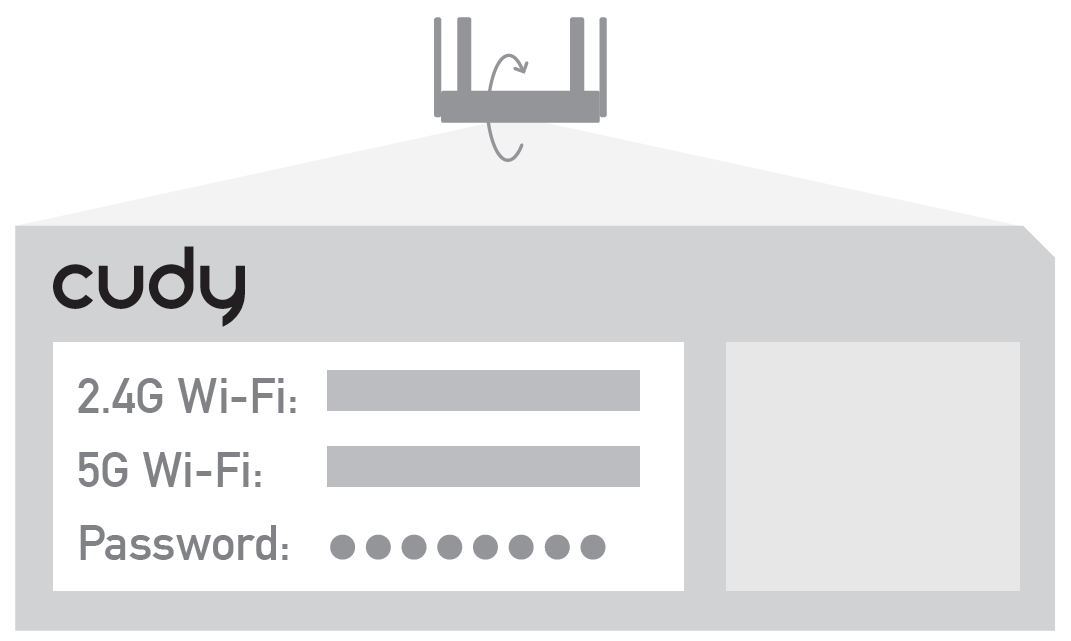
Check the default Wi-Fi SSID (Cudy-XXXX and Cudy-XXXX-5G) and the Wi-Fi password on the label of the router. As shown below.
-
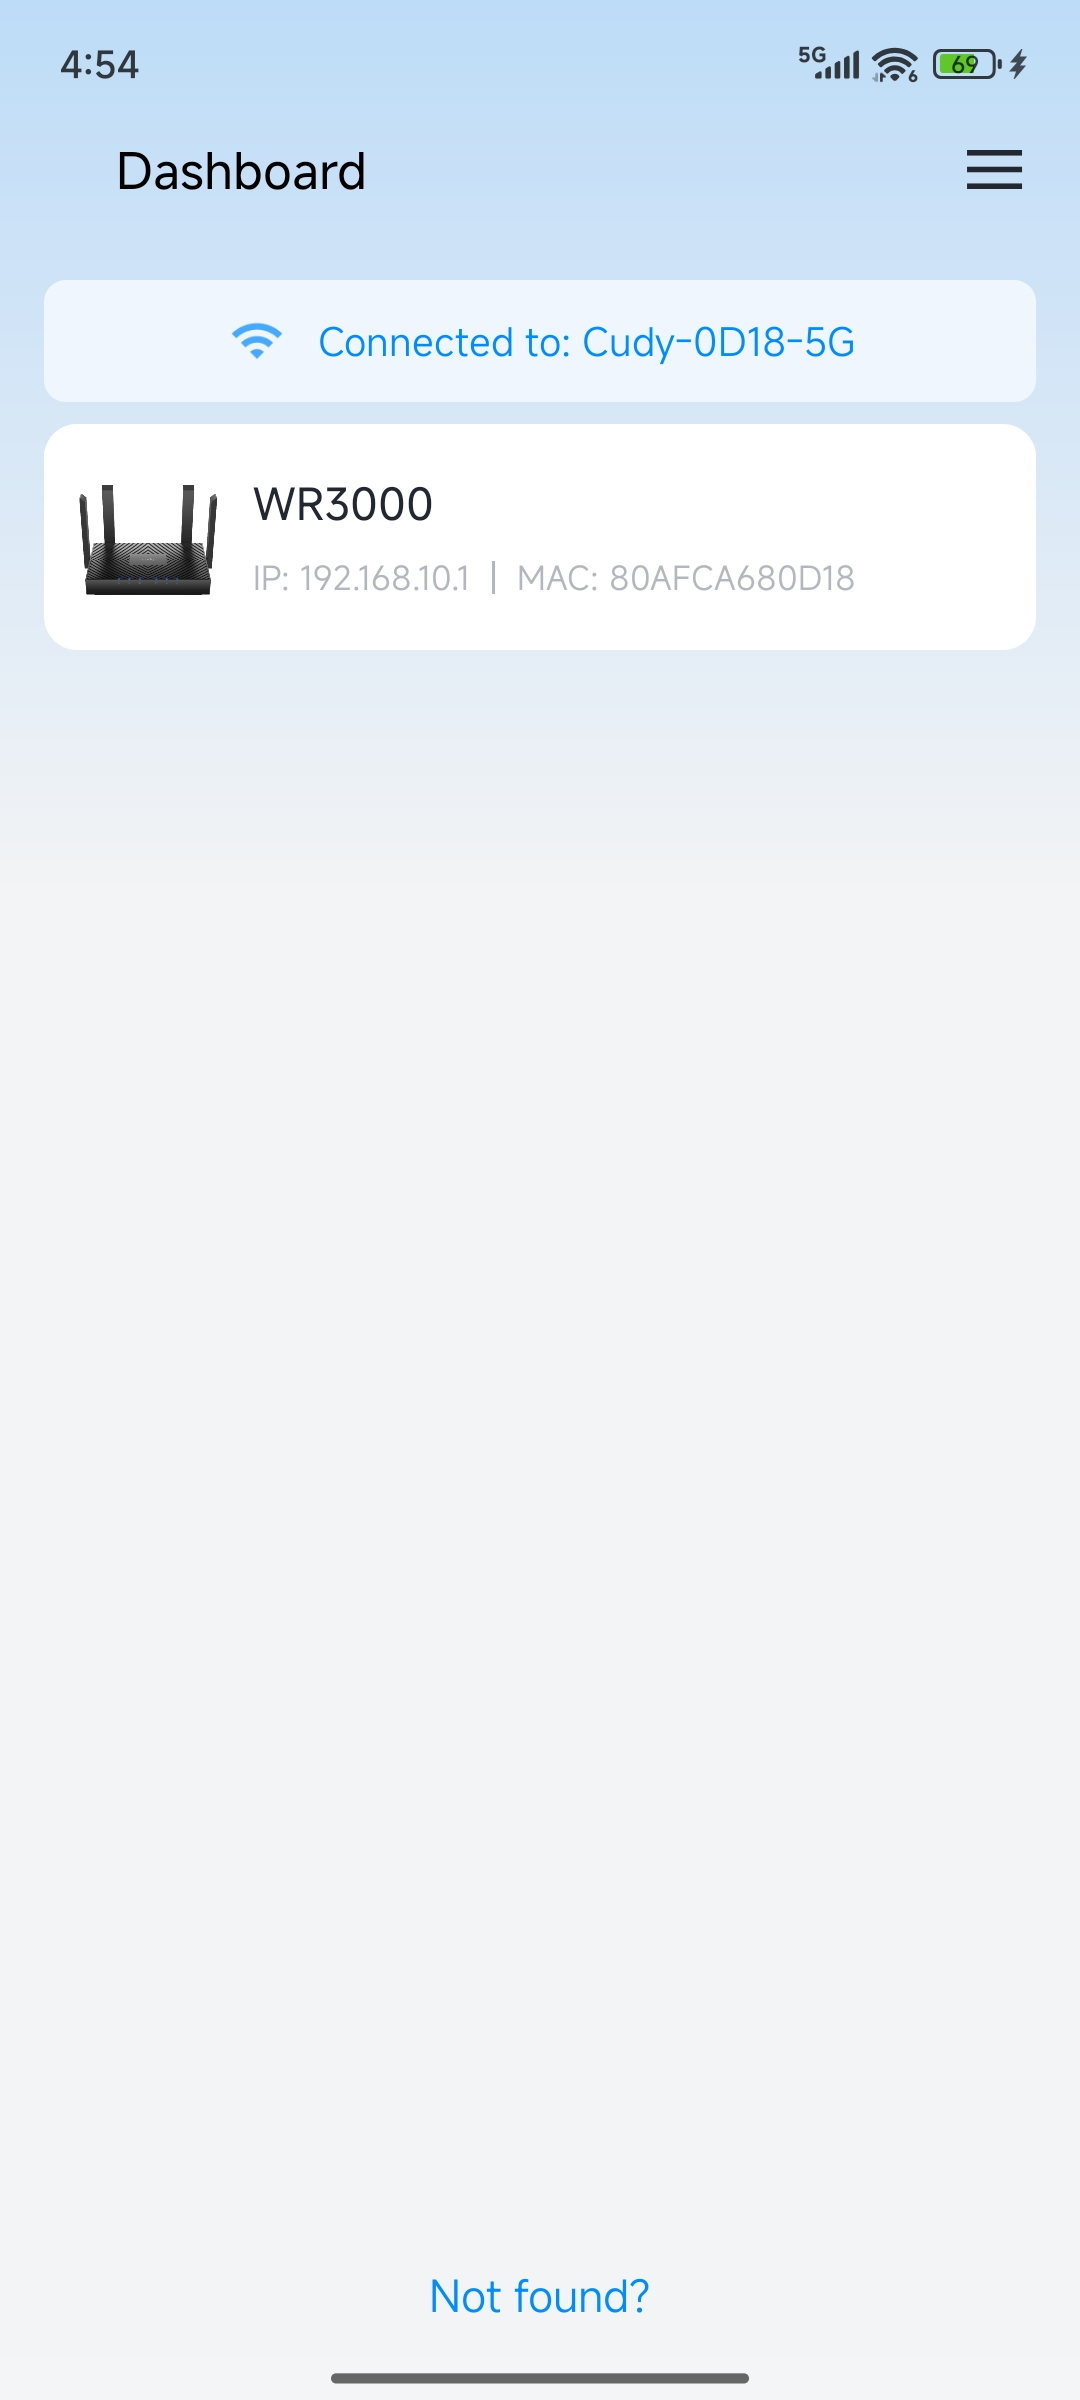
Go to your phone’s Wi-Fi settings and connect it to your Cudy router’s Wi-Fi network.

-
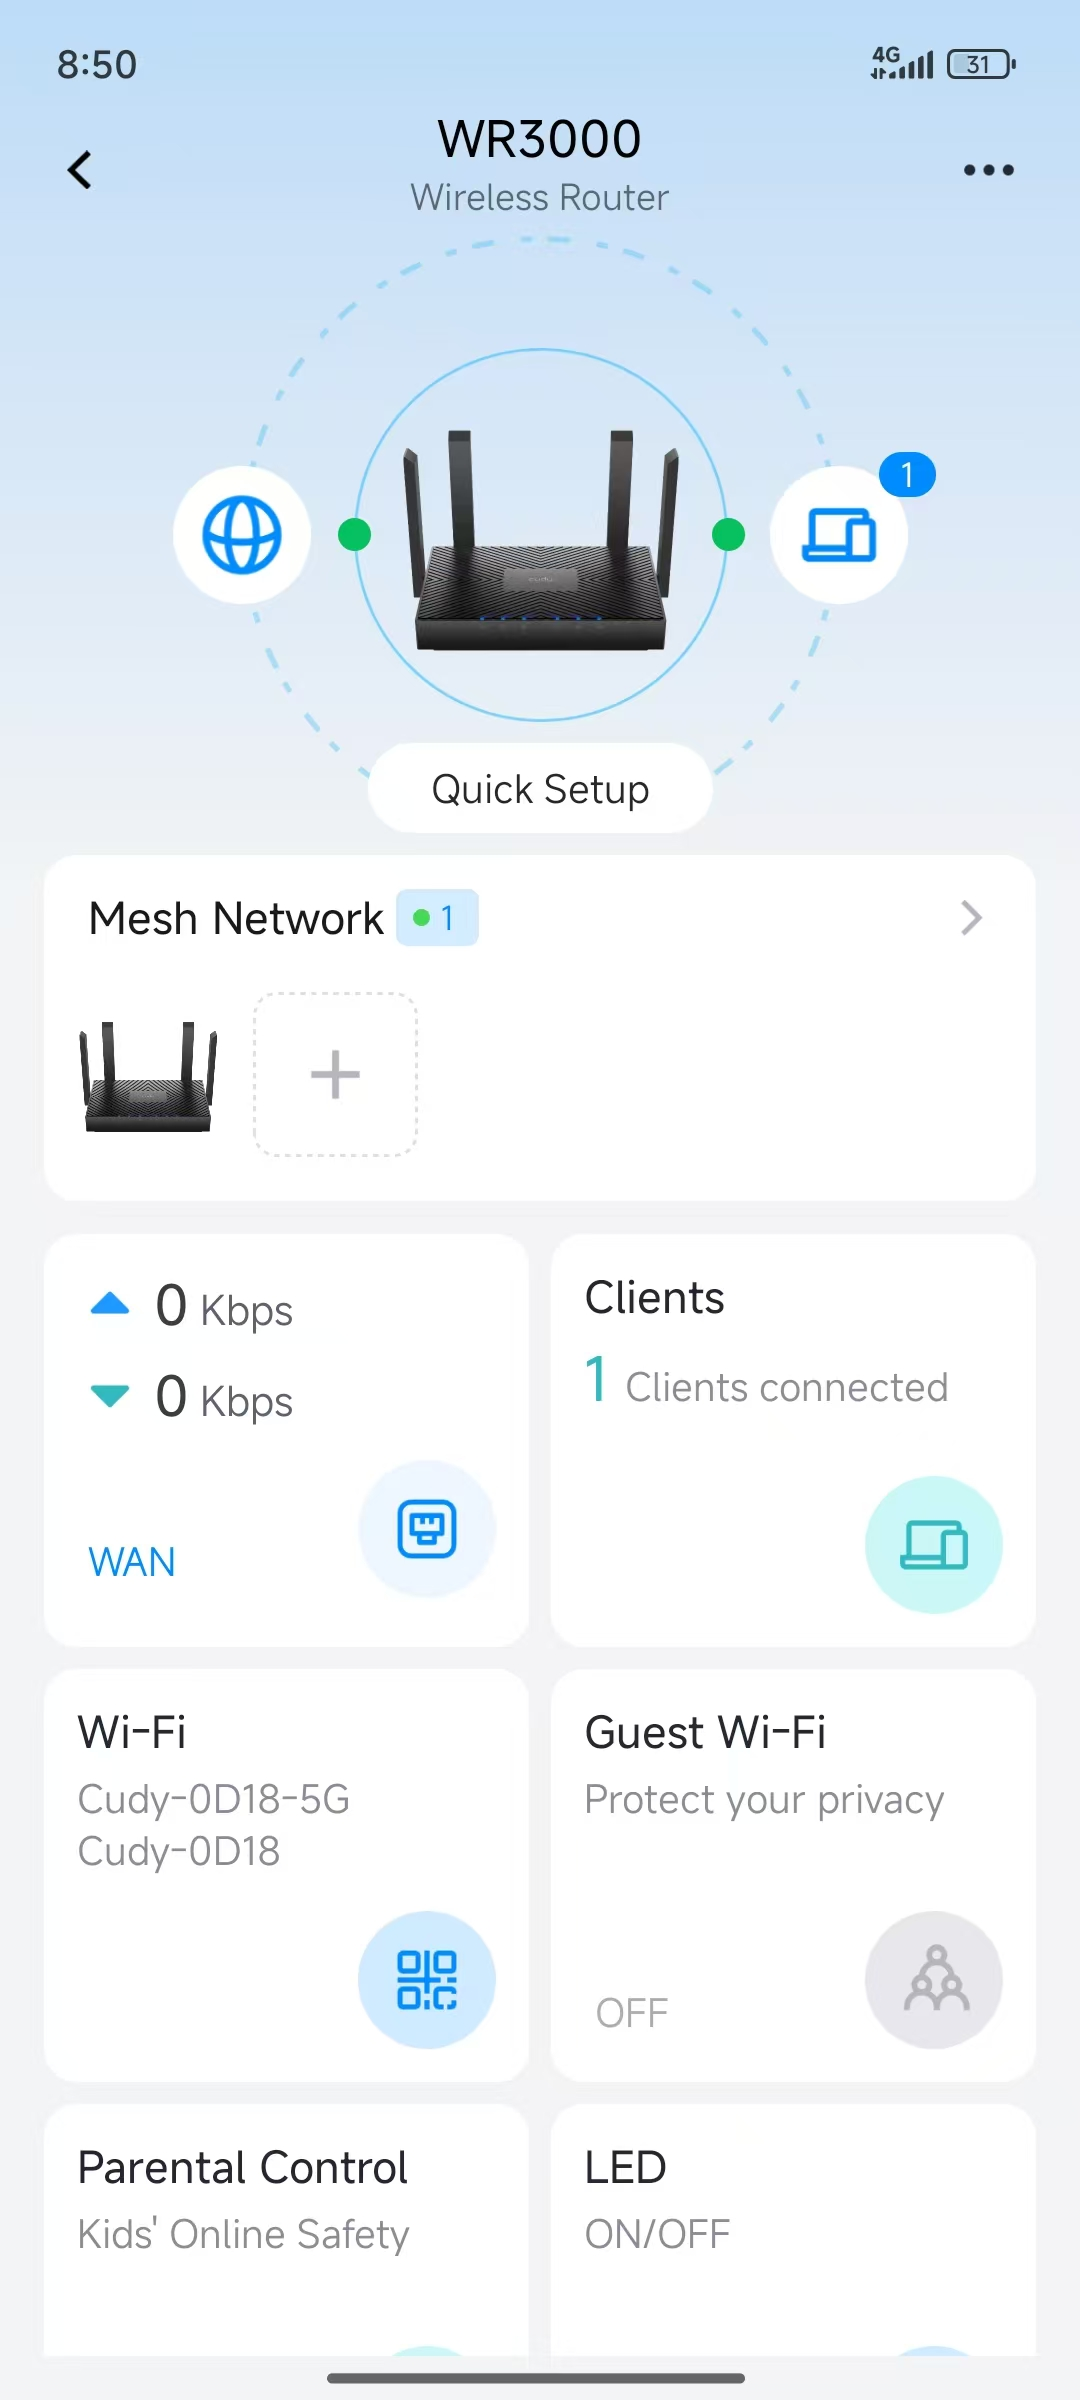
Open the Cudy APP. You will find the Cudy router on the Dashboard automatically.
-
Tap on your router icon. You need to create or input administrator password to login to the router.

-
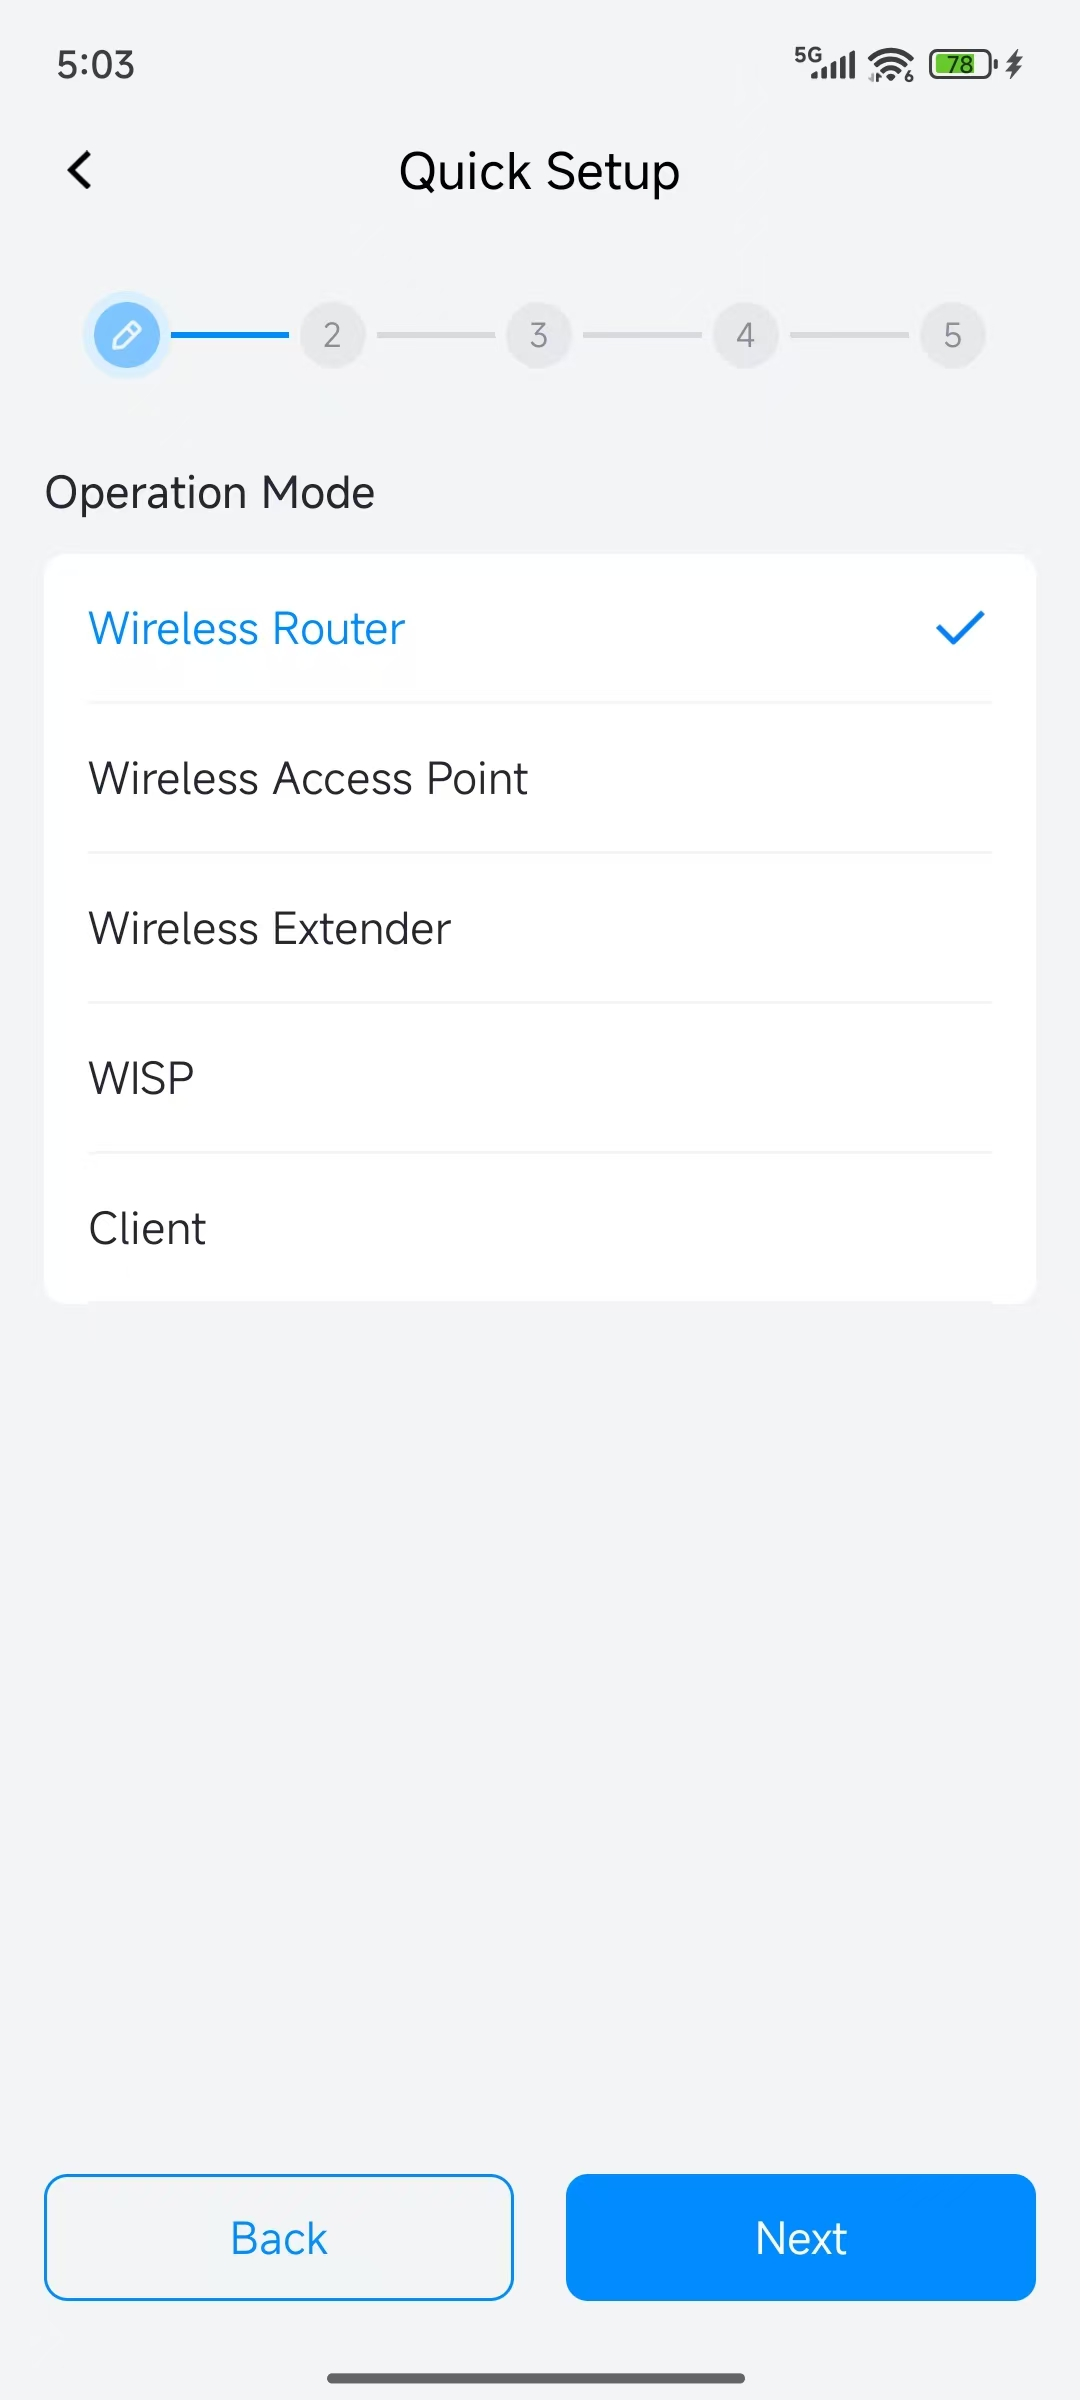
The Quick Setup will auto-launch. Choose the "Wireless Router" mode and tap "Next".
-
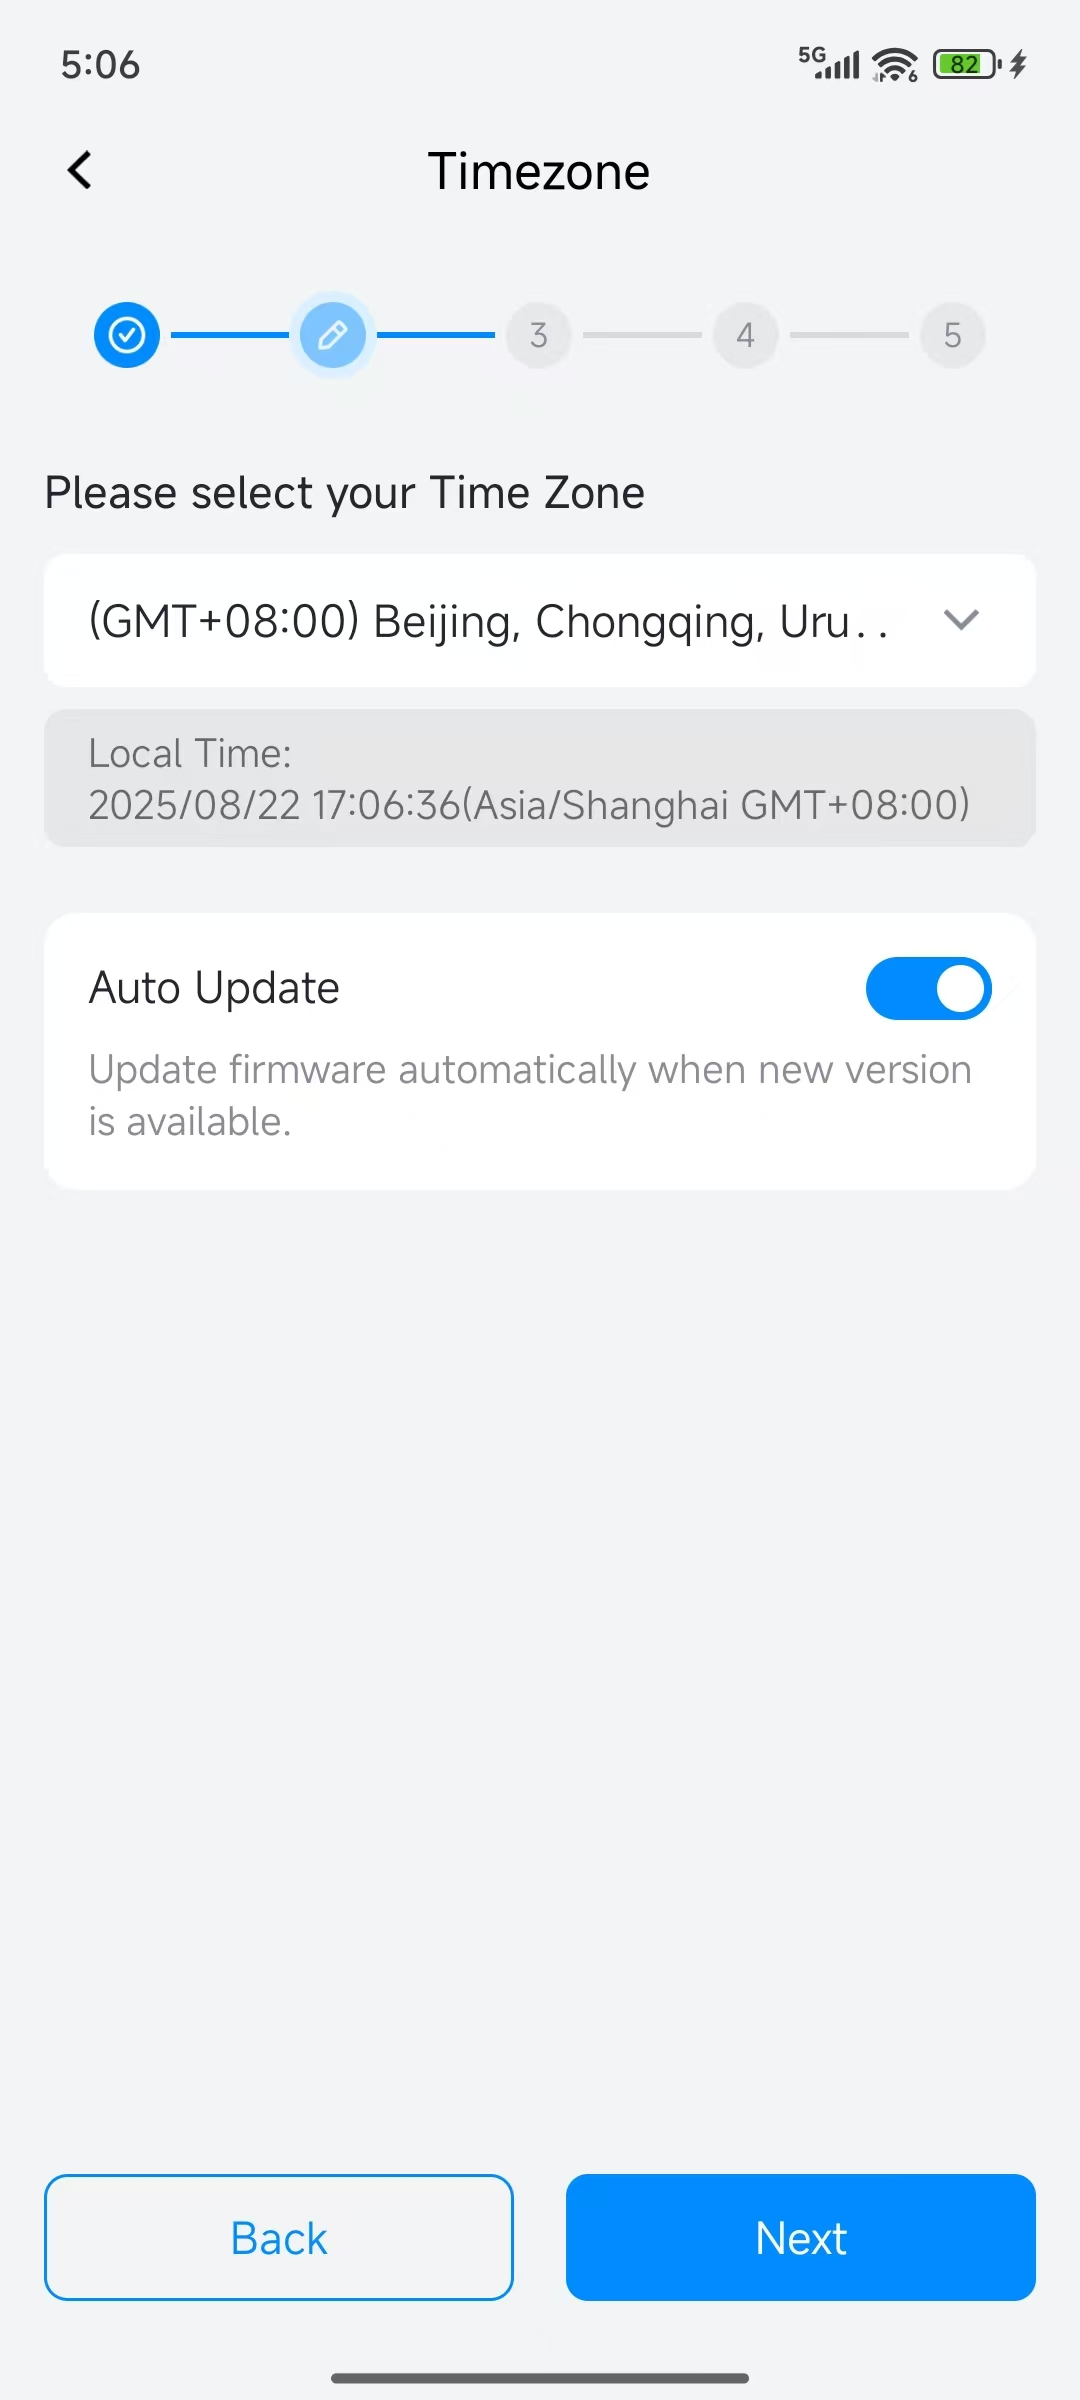
Set your Time Zone and tap "Next". The "Auto Update" is enabled by default. If you don't want to update the firmware of your router automatically, please disable it.
-
Set the WAN connection parameters and tap "Next".

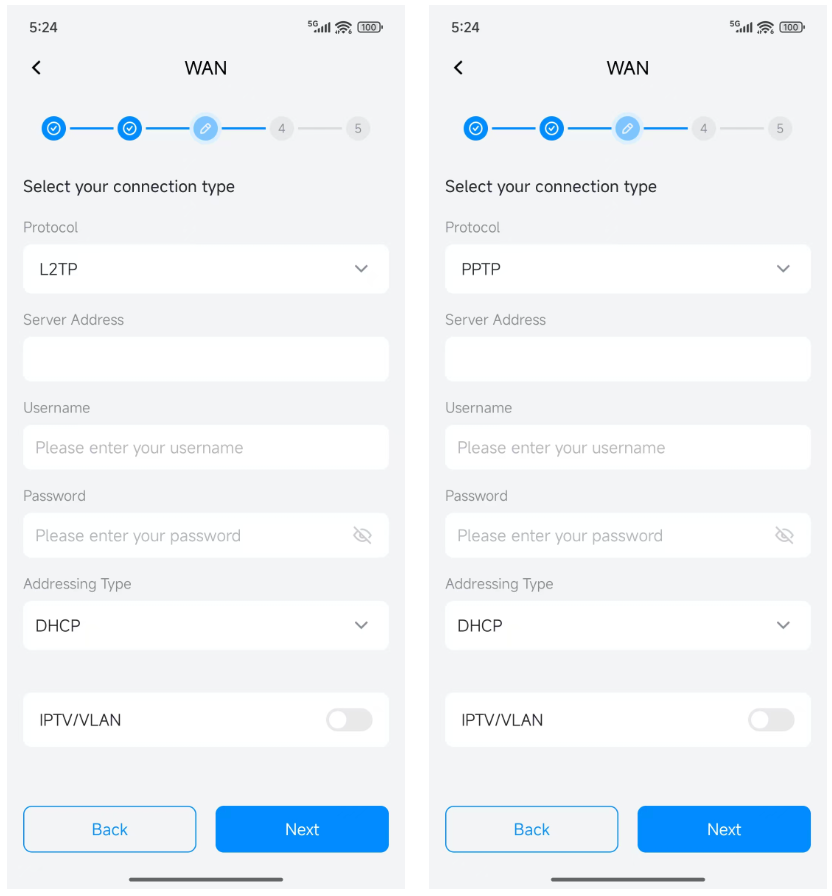
There are 5 types of protocols, DHCP, PPPoE, Static(Fixed IP), L2TP, PPTP. You can change it according to the instructions of your ISP.
-
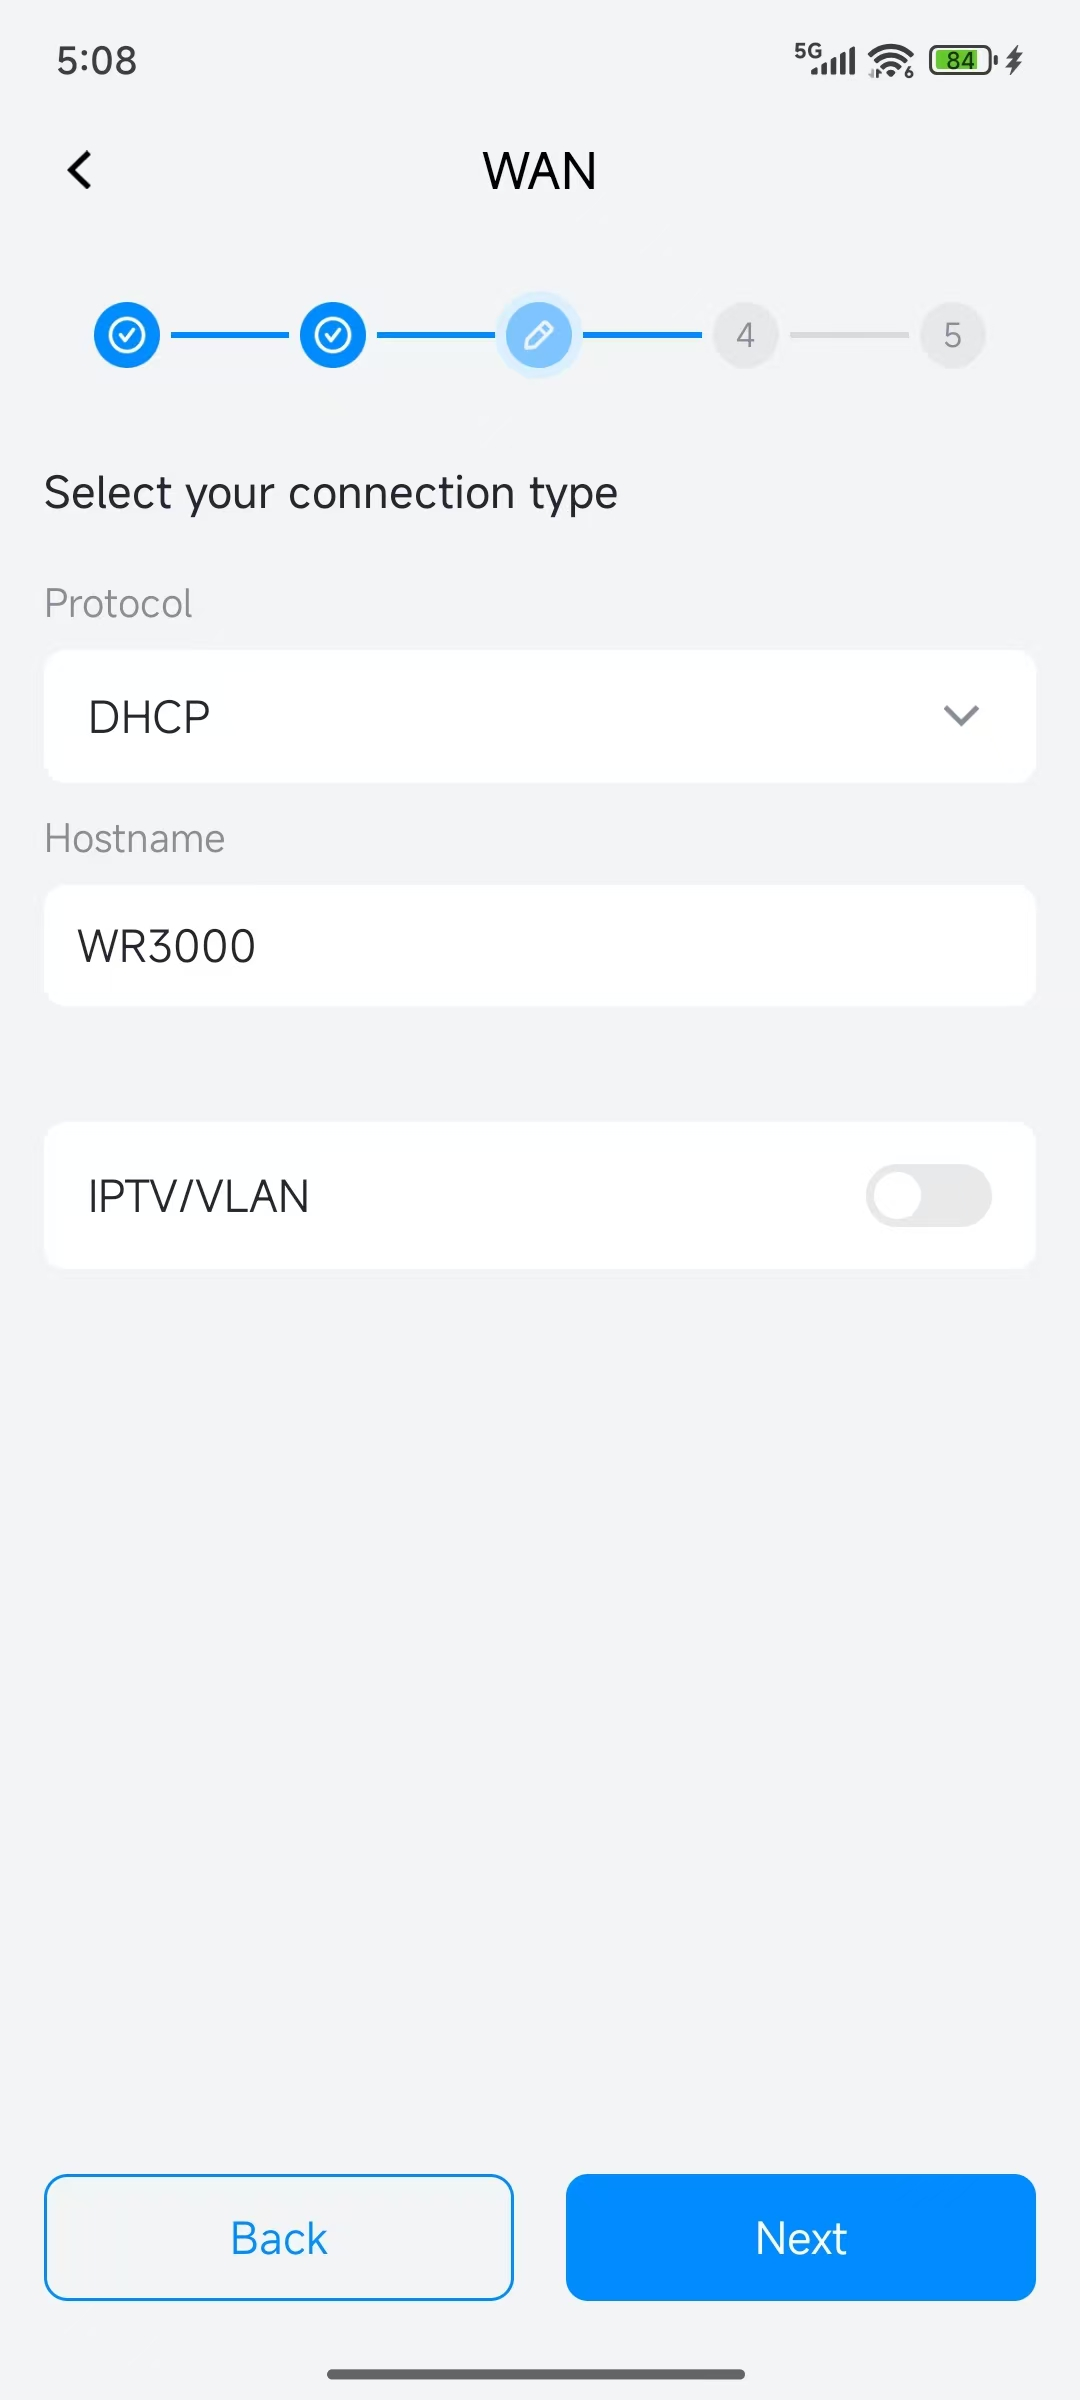
DHCP
DHCP is the default and most simple protocol. It is a network management protocol used on Internet Protocol (IP) networks for automatically assigning IP addresses and other communication parameters to devices connected to the network using a client–server architecture. There is no need to input any credentials and IP parameters.
-
PPPoE
PPPoE is a protocol used by many Internet Service Providers (ISPs). Generally, your ISP will provide a modem and give you the username & password that you need when setting up the Internet connection.
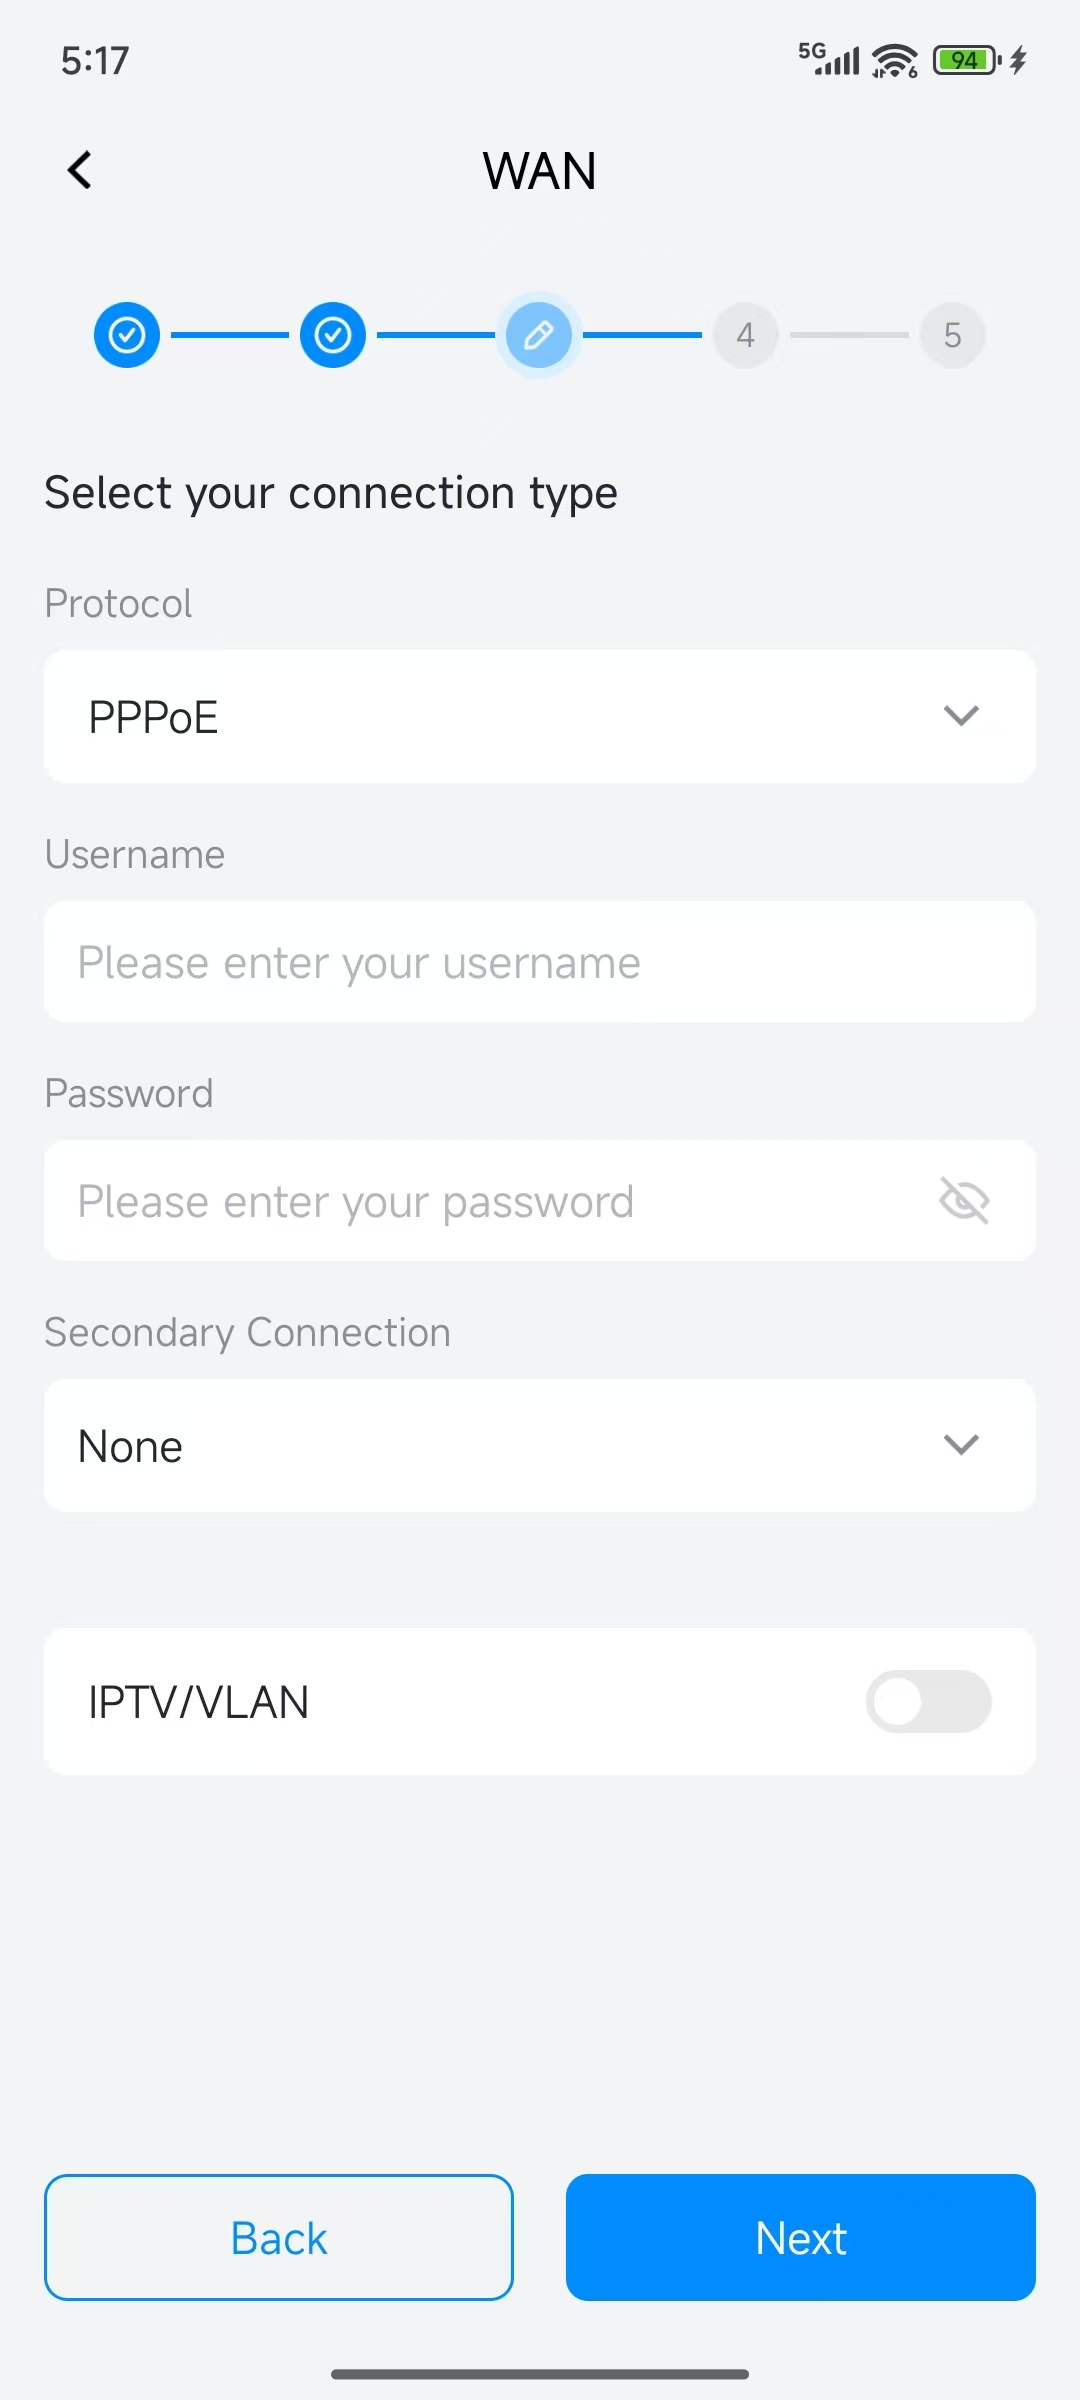
Note
Please input the PPPoE username and password carefullly. The router will not be able to connect to the internet if you input wrong username or password.
-
Static(Fixed IP)
Static(Fixed IP) is required if your Internet Service Provider (ISP) has provided a fixed IP address for you or you want to configure the network information such as IP address, Gateway, Netmask, DNS manually.

-
L2TP and PPTP
L2TP and PPTP are VPN protocols and can also be used for WAN connection. They are not a common protocol. You must input proper parameters to access the internet.
-
IPTV/VLAN
Most broadband lines don't need to set this, then you can skip the IPTV/VLAN function. Tap "Next" after set the WAN parameters. But some ISPs use VLAN IDs to distinguish different services. If your broadband line needs to set the VLAN ID. You must enable the IPTV/VLAN function. As shown below.
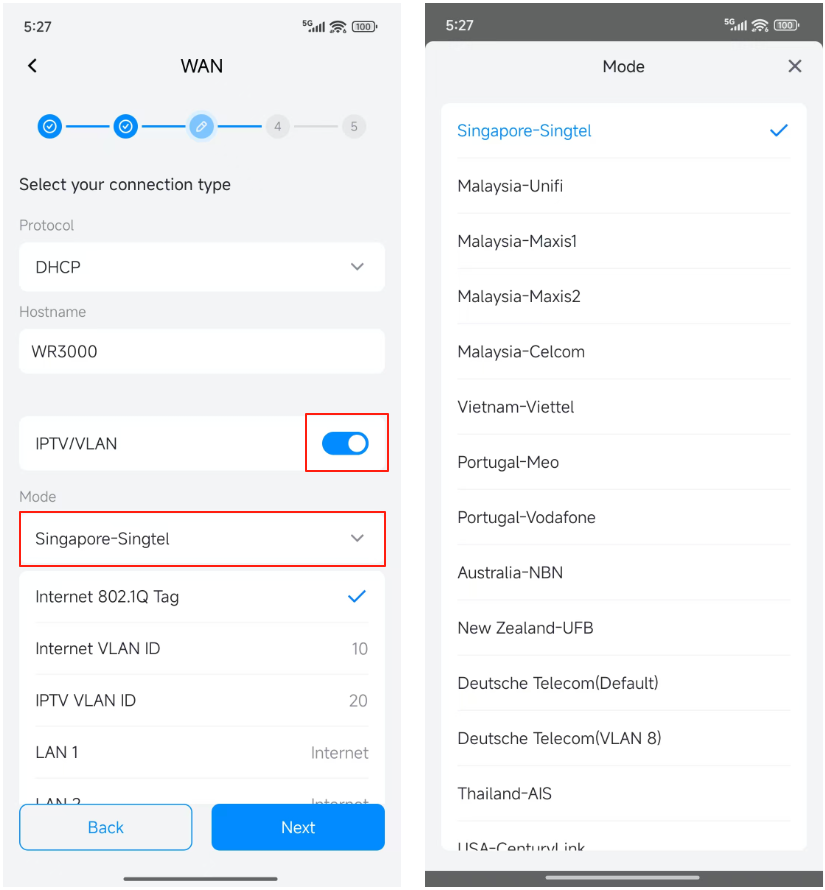
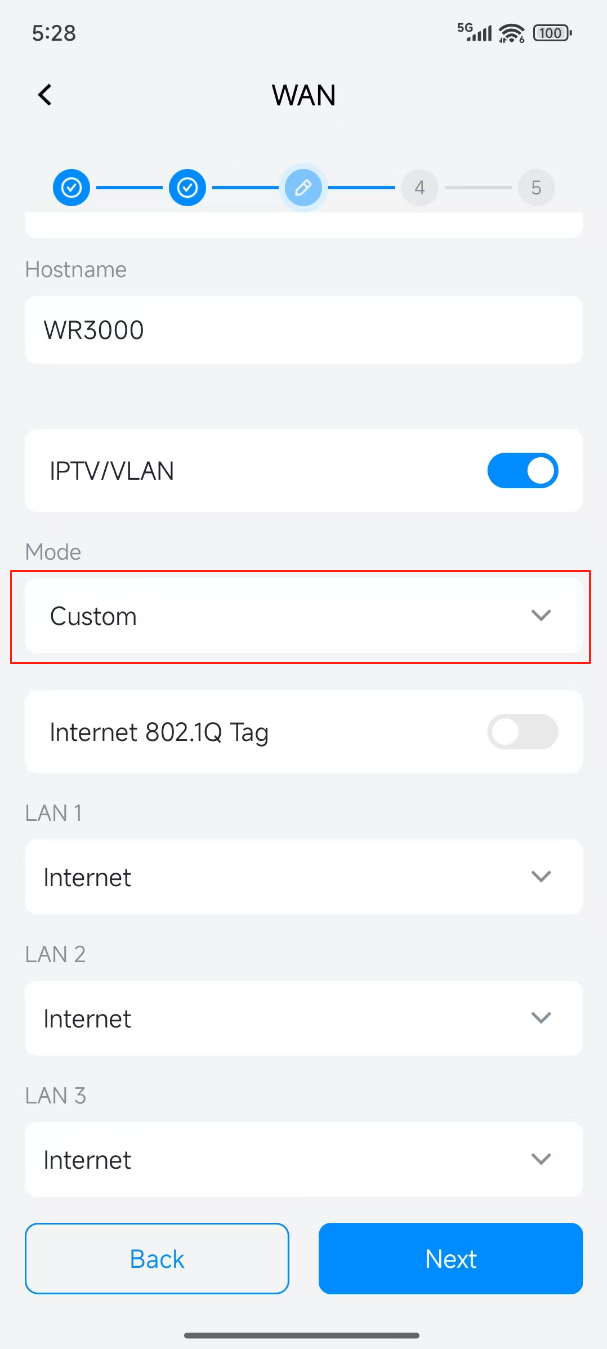
There are some default templates for the ISPs all over the world. You can choose the ISP name of your broadband line. If there is no template for your ISP or you want to customize the VLAN ID. You can set the mode to "Custom", then you can set it as your need.
For example, if the VLAN 500 is used to transmit Internet services, VLAN 600 is used to transmit IPTV services. You can set it as the following.
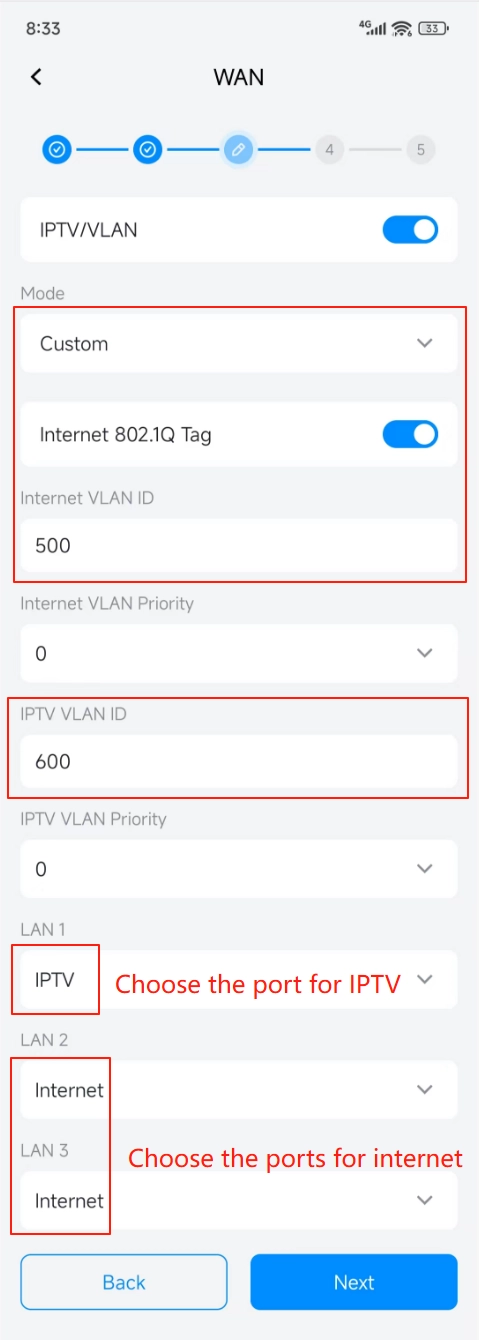
Set all the WAN connection parameters and tap "Next".
-
-
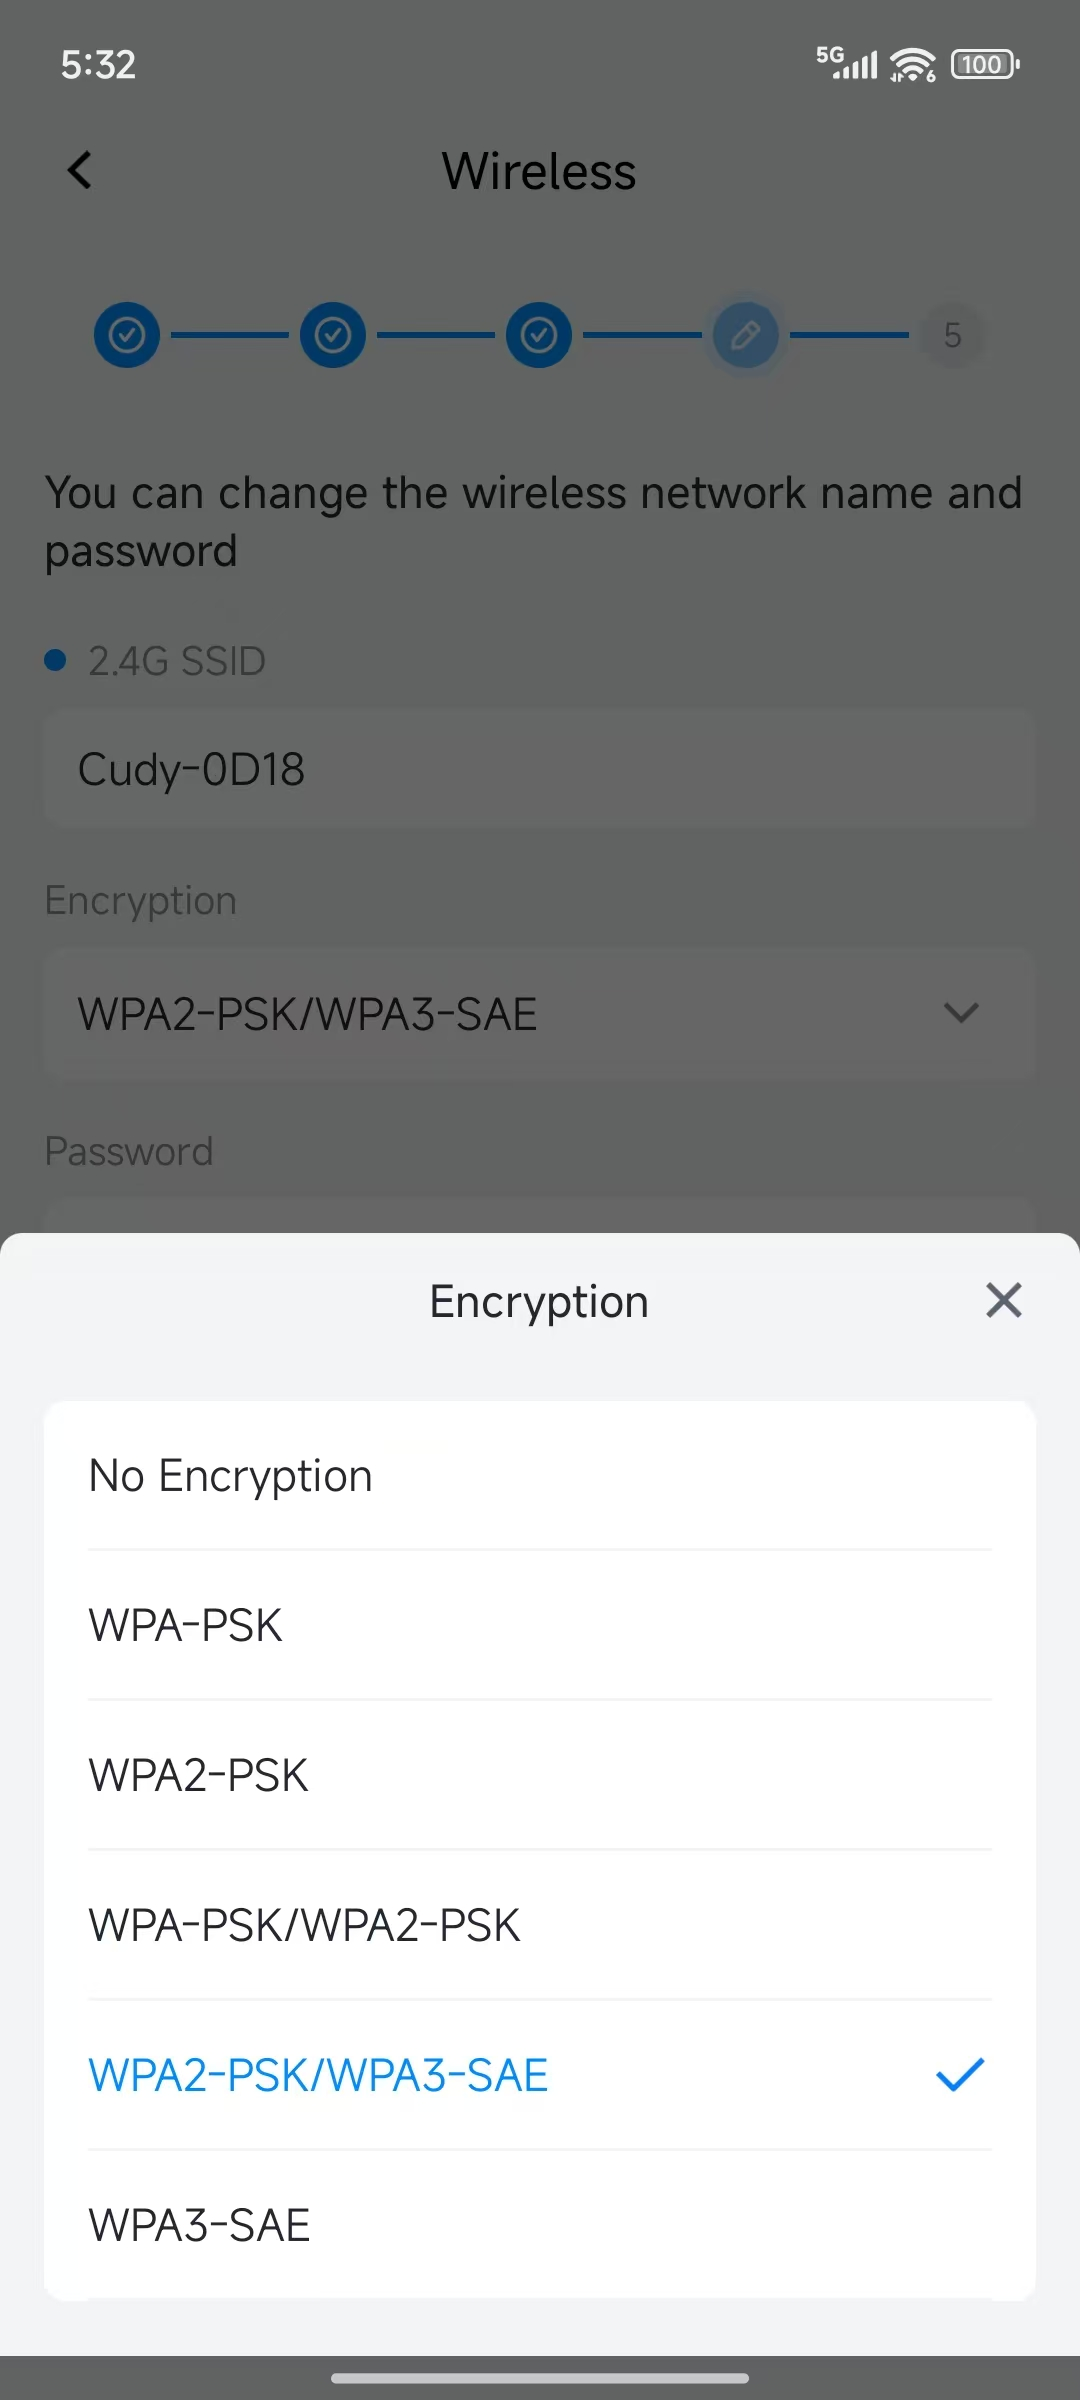
Set the Wireless parameters and tap "Next".
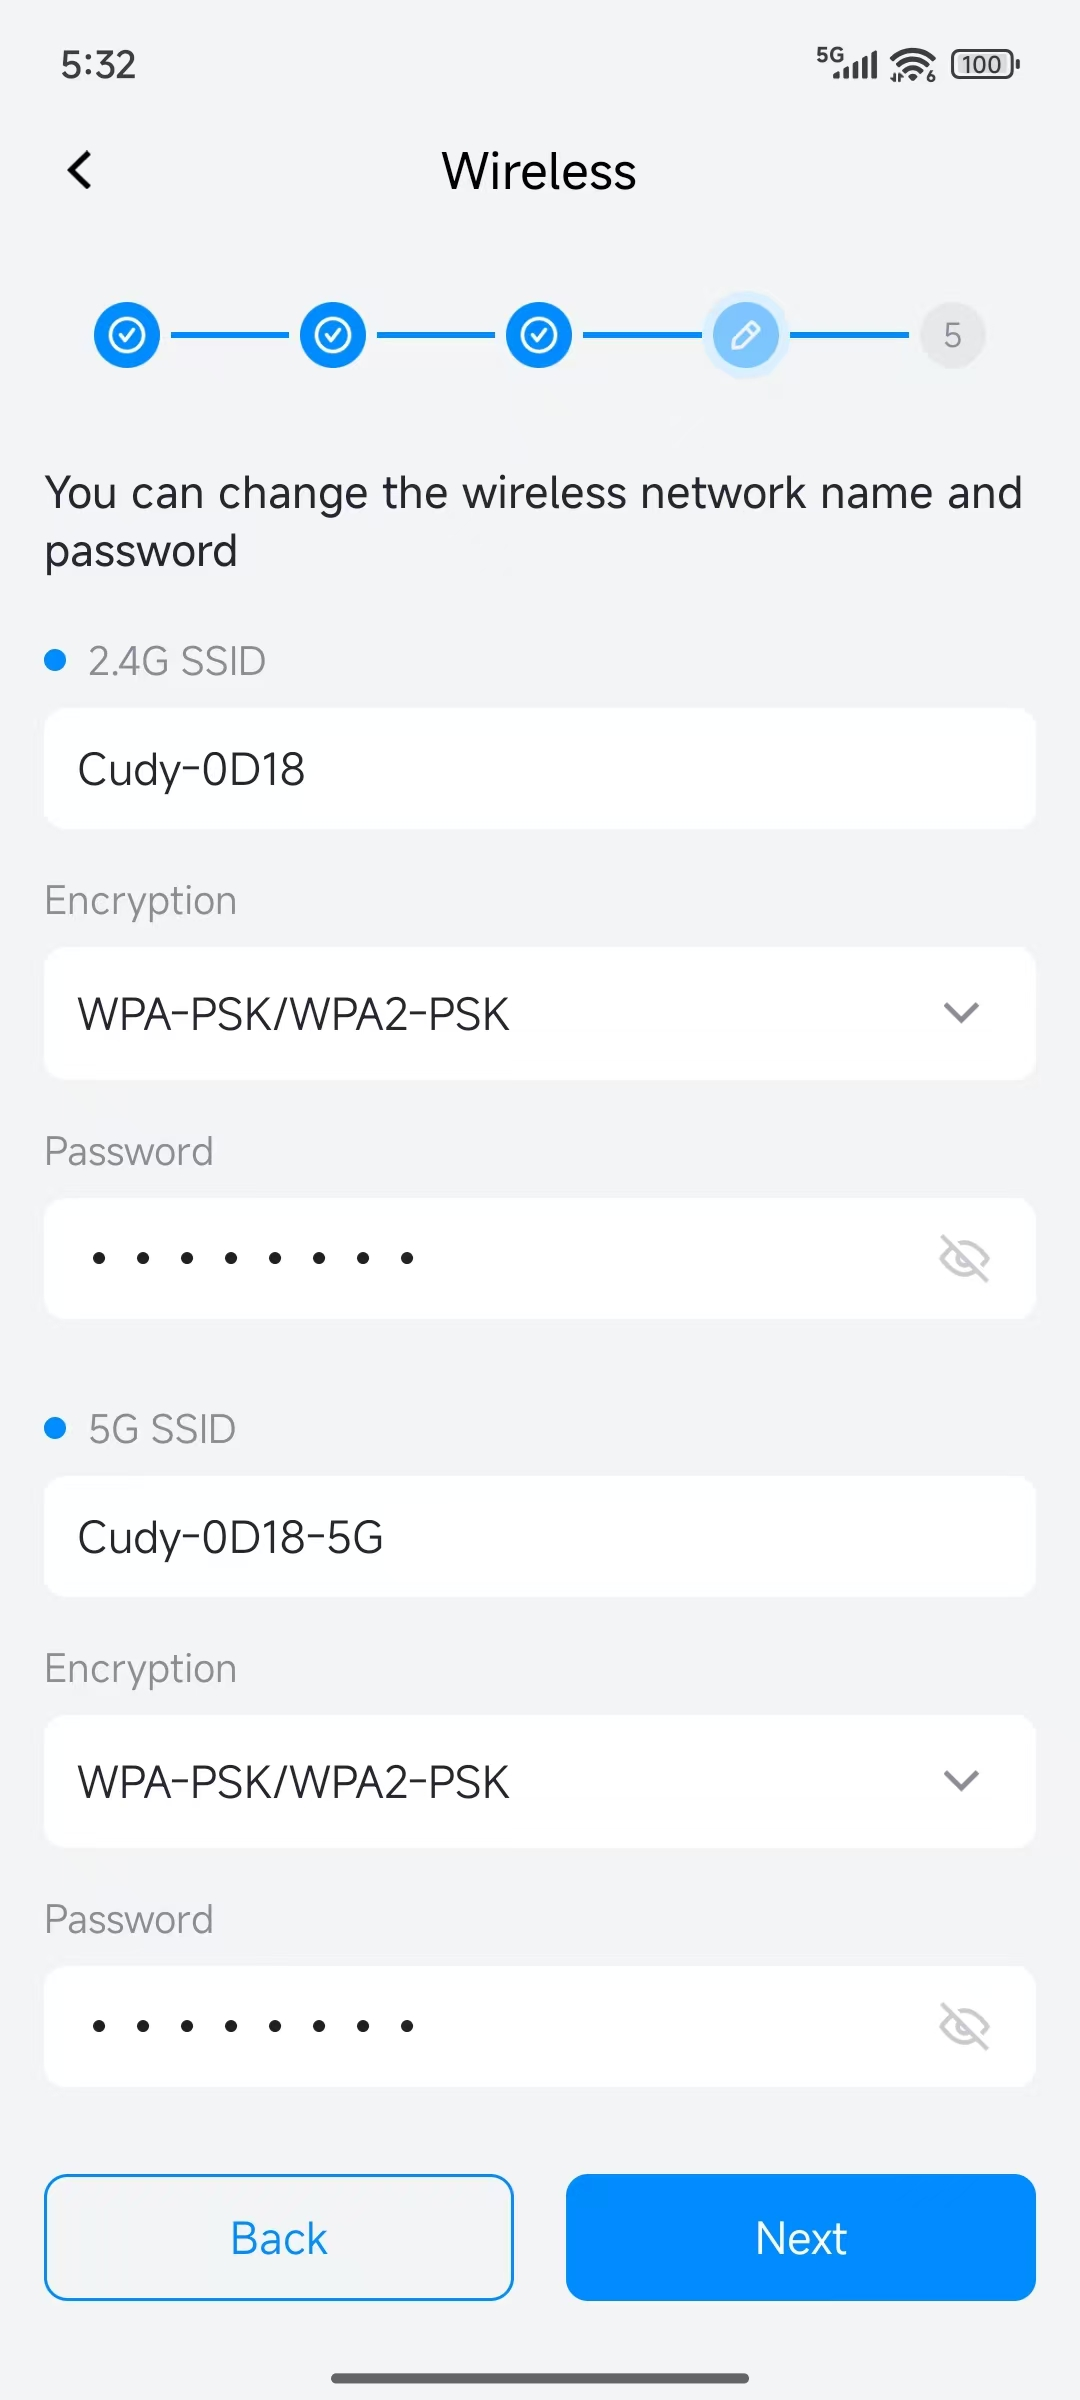
You can set the 2.4G and 5GHz Wi-Fi name, Encryption and Wi-Fi password of your router. For "Encryption", we suggest WPA2-PSK/WPA3-SAE. But if there is some old device that only supports the old encryption protocol WPA-PSK. You can keep the Encryption to "WPA-PSK/WPA2-PSK".
-
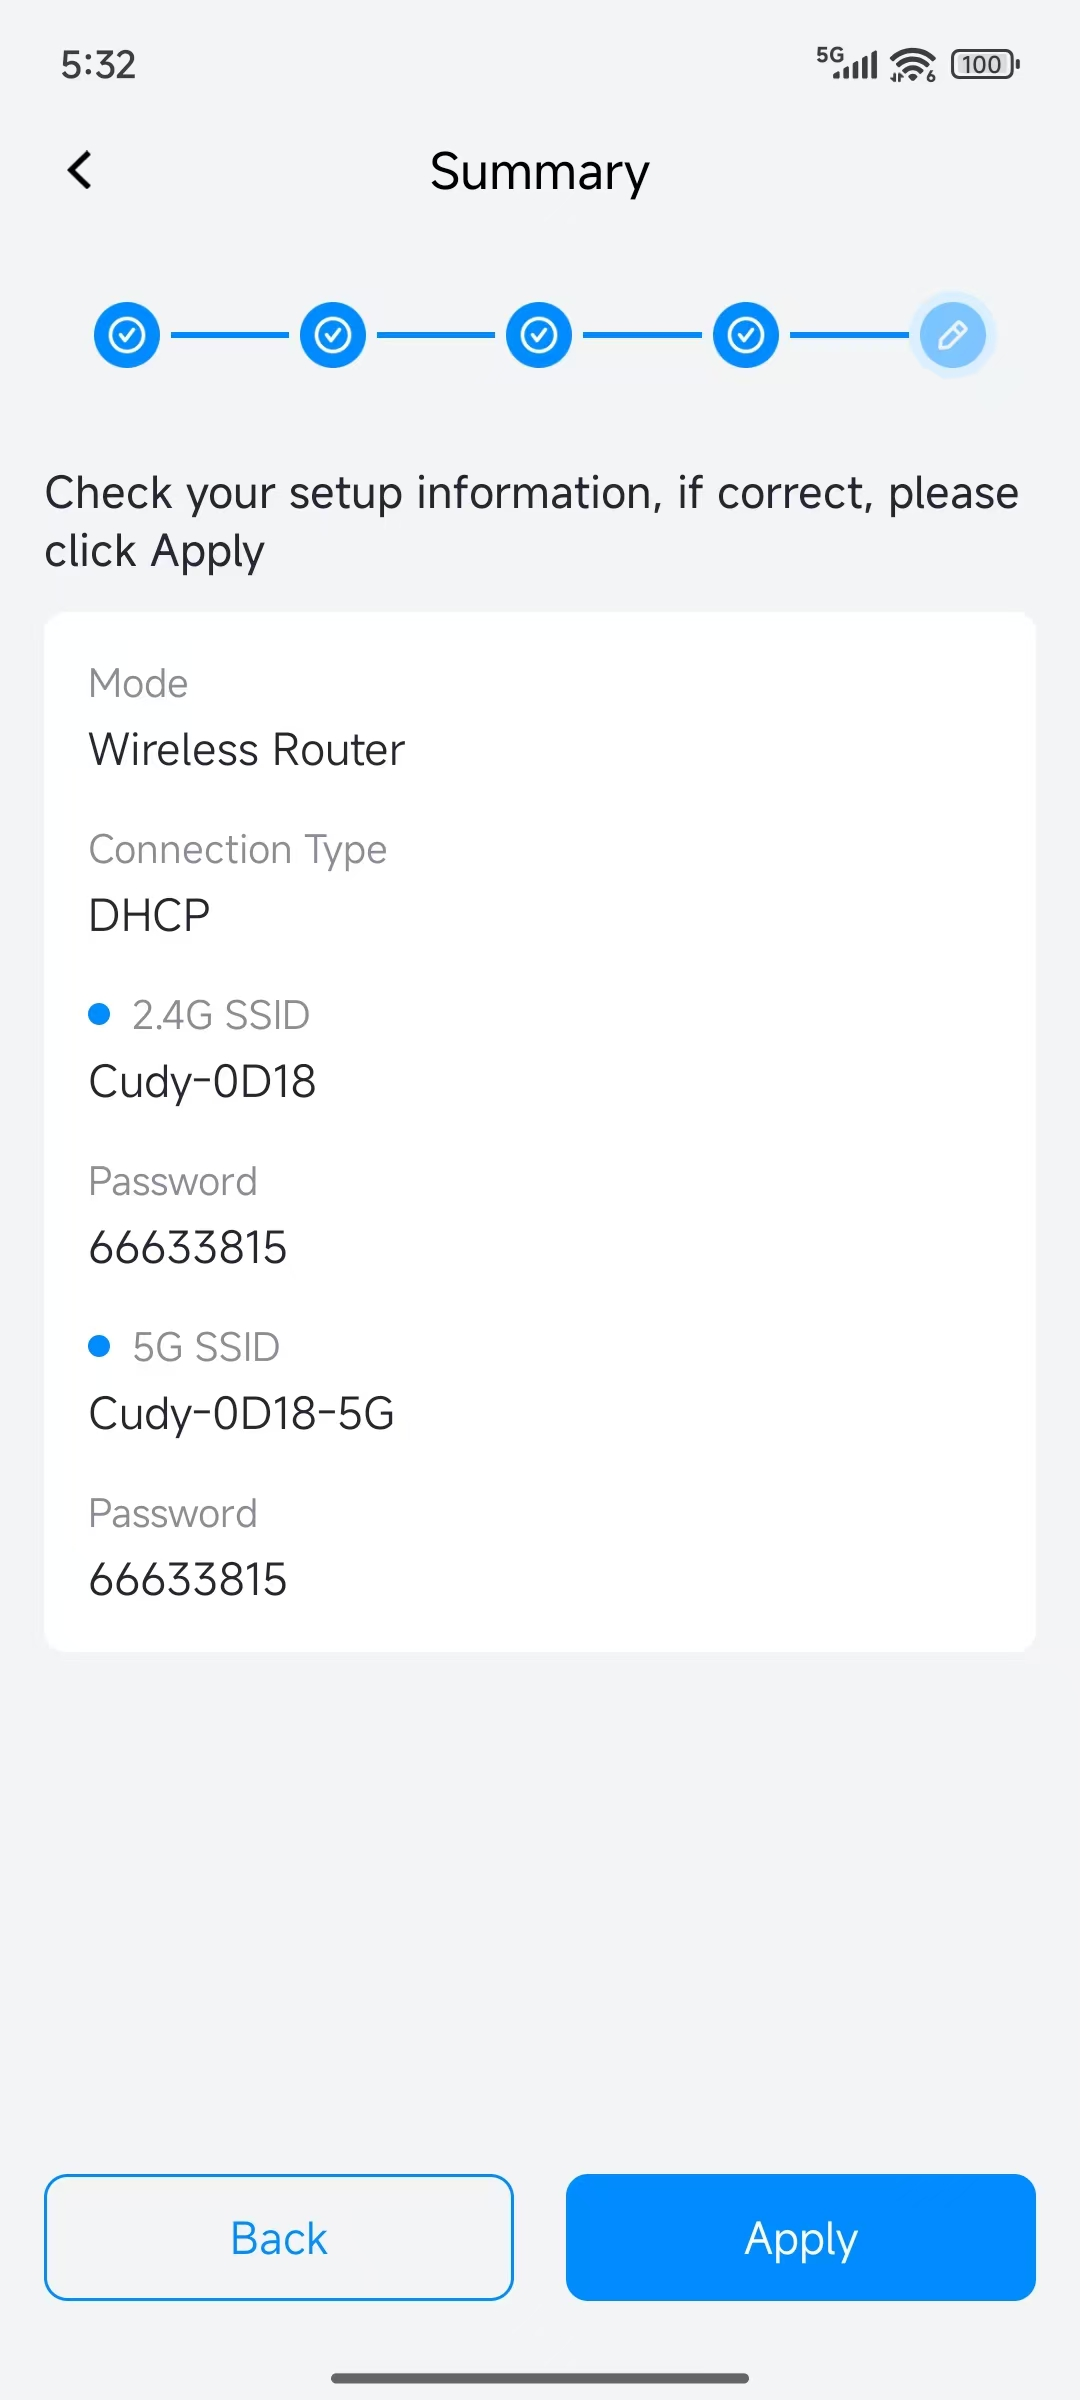
Check all the settings and tap "Apply". Click "Yes" to allow the router to restart. The settings are finished.
-
Then connect to the new Wi-Fi name you set before and login to the router again. Check the status of the router. The router will connect to the internet successfully.